Forking the knowledge base
For Github users with read access, one can contribute by forking the knowledge-base repository. Forking will create a copy of the repository into your account. Since you own the copied repository, you will have permission to push changes to it. Firstly, visit the Github repository; make sure you are logged in and your account has at least read access to the repository. You should see the following:
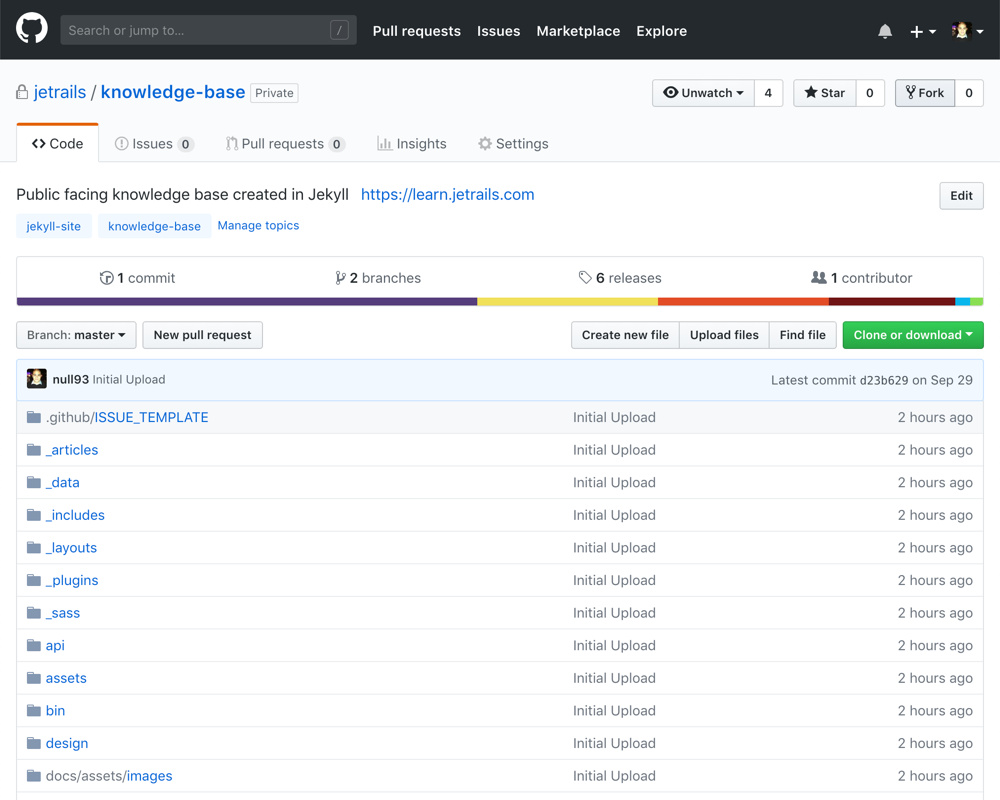
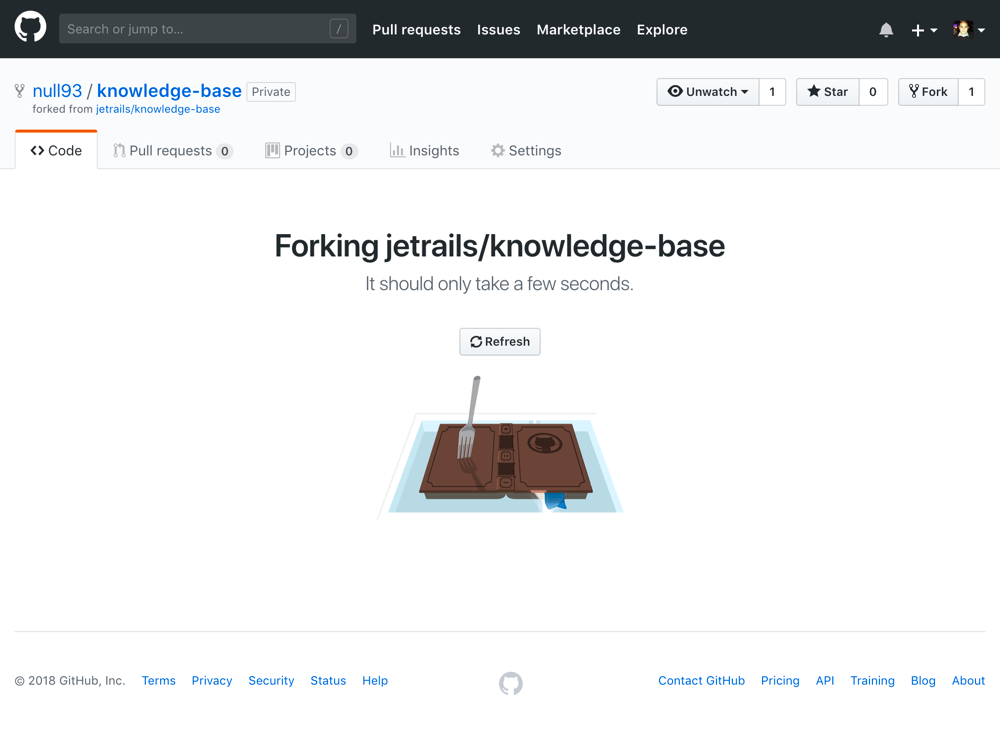
The “Fork” button can be found on the top-right side of the page. Clicking on it will start coping the repository into your account.
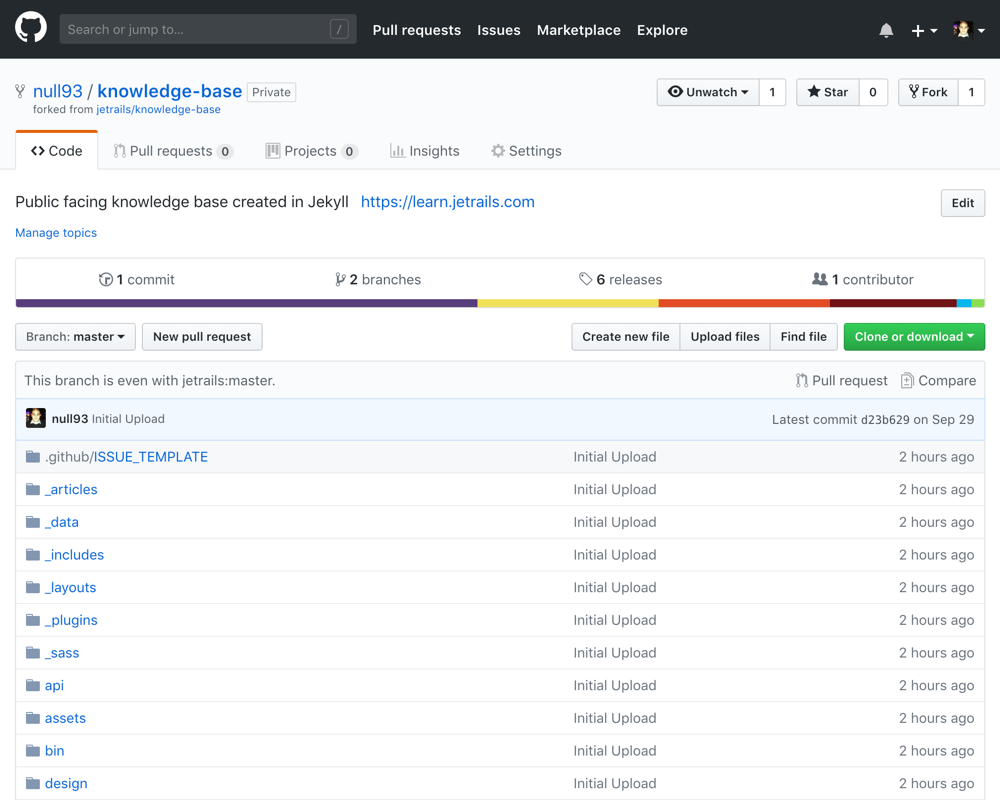
Once complete, you will see that you have a copy of the knowledge-base repository, but owned by your Github account (null93 in my case).
Cloning your repository
You will have to clone the forked repository locally onto your machine. This article will not go through the process of authenticating your Github account.
Open your terminal and navigate to a directory where you can clone your forked repository. Clone the repository, and enter the project directory. In my case, it will look something like this:
$ cd ~/Github/null93
$ git clone [email protected]:null93/knowledge-base.git
$ cd knowledge-base
You will need to create a feature branch for your article that is branched off the staging branch. Lets assume that the title of your article is Writing Your First Article. Then you would want to create a branch that has the name within it but prefixed by feature-. In my case that will be: feature-writing-your-first-article. Creating this branch off the staging branch can be done with the following command:
$ git checkout -b feature-writing-your-first-article origin/staging

Branch 'feature-writing-your-first-article' set up to track remote branch 'staging' from 'origin'.
Switched to a new branch 'feature-writing-your-first-article'
You are now ready to contribute, before you create a new article, you will learn how to build and run a development environment.
Development environment
The development environment for this project can be spun up using docker-compose. Optionally you can use just docker alone, but this will not be covered in this article. Docker compose is meant to simplify the process and that is why we will be using it. In the project base directory, you will find a Dockerfile file. This defines the build instructions that a docker image uses to construct an environment. Additionally, in the project base directory, you will find a docker-compose.yml file. Information within this file is used to build and run the docker image. Spinning up the development environment is as easy as running the following command:
$ docker-compose up -d
This will build the docker image and spin it up in the background (that is what the -d or --detach flag does). When you are done, you can run the following to stop and remove the docker container:
$ docker-compose down
If you find a time when you need clear your docker environment out and start fresh, this can be accomplished by running the prune option.
$ docker system prune -a

WARNING! This will remove:
        - all stopped containers
        - all networks not used by at least one container
        - all images without at least one container associated to them
        - all build cache
Are you sure you want to continue? [y/N]
Please Note: This will only remove resources that aren’t running. You can also use the
--volumesflag to prune your volumes.
Creating a new article
If you are a new contributor, you should first add yourself to the author’s list. This can be found in the _data/authors.yml file. As an example, I added myself by appending the following:
-   id: rafael.g
    first_name: Rafael
    last_name: Grigorian
    email: [email protected]
Please Note: The
idparameter must be unique among all other users.
Alternatively, you can run the following script that will automate the process for you:
Creating a new article is super easy, all you have to do it create a .md file somewhere inside the _articles directory. The sub-directory structure inside the _articles directory will define your category. For example, this article is located in _articles/meta/tutorial, hence this article belongs to the meta/tutorial category.
Jekyll uses gray matter to define metadata inside your article’s source file. Gray matter can be defined by writing yaml in between the --- character sequence in your article file. This is found on the very top of your file. Lets look at this article’s gray matter:
---
layout: article
tags: [ "tutorial", "git", "markdown" ]
timestamp: "2018/11/19"
timestamp_updated: "2018/11/19"
author: rafael.g
description: >
    Detailed guide walking a new contributor through the contribution
    process. This article takes the reader through the process starting
    from forking the knowledge base repository, all the way to opening up
    a pull request to contribute as a read-only user. Extended liquid and
    markdown functionality is also discussed.
---
| Key | Description |
|---|---|
layout | This must always be set to article |
tags | An array of tags to use for this article |
timestamp | Timestamp string in the format of YYYY/MM/DD |
timestamp_updated | Timestamp string in the format of YYYY/MM/DD |
author | The author’s id must be the value of this field |
description | This description will be displayed as an article preview |
This process is all automated for you if you run the following script:
Using images
Images are stored within assets/images. Please do not manually add these images into this directory, instead use the tools/import_asset executable. This script, takes in one parameter which is a path to your asset. It then calculates a SHA256 hash of the file and renames the file to the resulting hash. It then copies the asset into assets/images. After executing the command, a markdown snippet is returned. This snippet should be used in your markdown article to reference and load your image.
From the above output, you can see that embedding the images can be done using the following liquid syntax:

If you would like to frame your image inside a fake browser window, you can achieve this result by adding {: .browser-screenshot } to your image element like so:
{: .browser-screenshot }
Using screen recordings
Embedding animated images and video clips is discouraged. This is primarily due to the fact that those types of files are bulky in size and quality tends to disappoint anyways. For this reason we integrated ansiinema into our site. This CLI tool captures input/output and stores it in a .cast file, resulting in smaller file sizes and crisp playback. Installation instructions and general use instructions can be found on their website. We are however going to talk about how to integrate a cast into an article. First you will want to import the asset into the project’s file system. This can be done with the same binary tool that is used to import images.
You can now see from the above output that the following liquid snippet can be used to embed the asciinema cast inside your markdown article:
{% asciinema "/assets/asciinema/c614e9299d4e2a37f72527050a2a71aa062def7f.cast" %}
This should result in the following output:
Extended markdown
Github flavored markdown is used as a base for the markdown spec. It is then extended using liquid to support functionality that is otherwise unavailable.
Below is a note, and it can be rendered with the following liquid tag:
{% note %}
This is a note
{% endnote %}
This is a note
Below is a warning, and it can be renedered with the following liquid tag:
{% warning %}
This is a warning
{% endwarning %}
This is a warning
Below you will see a rendered terminal window. This will be used to effectively show terminal output or shell command input sequences. It can be rendered using the following code:
```terminal
$ echo -e "\nHello World"

Hello World
```
$ echo -e "\nHello World"

Hello World
Finally you have a configurable code snippet. These snippets contain placeholder values that can be configurable. Changing the value of one type of variable will change the value across the whole snippet and in fact across the whole page.
zone "{{{domain:example.com}}}" in {
	type slave;
	file "slave/{{{domain:example.com}}}.zone";
	masters { {{{ip:127.0.0.1}}}; };
};
This configurable code snippet can be rendered with the following code snippet:
```config
zone "{% variable "domain" "example.com" %}" in {
	type slave;
	file "slave/{% variable "domain" "example.com" %}.zone";
	masters { {% variable "ip" "127.0.0.1" %}; };
};
```
As you can see, the inline liquid tag named variable is where all the magic happens. Lets break down the components by looking at an example:
{% variable "domain" "example.com" %}
In the above example, the first parameter that is passed to the variable liquid tag is the variable name. The second parameter that is passed is the placeholder value and default value associated with said variable.
Running tests
Once you finish writing your article, you should run all the tests defined within this project. To run them, execute bin/run-tests. Execute this within your container by running the following command in another shell:
$ docker-compose exec knowledge-base bin/run-tests
Included in the test suite is a spell checking utility. If there are words that are spelled correctly but the spell checker thinks are wrong, then please add said words into the .spelling file. Your entries should be in lowercase and new line seperated. Alternatively, you can run a script that authomates the process for you:
Pushing code to your repository
Once you are happy with your content and all tests ran successfully, you can push your code into your repository.
$ git add -A
$ git commit -m "Finished article writing-your-first-article.md"
$ git push origin feature-writing-your-first-article
Open pull request
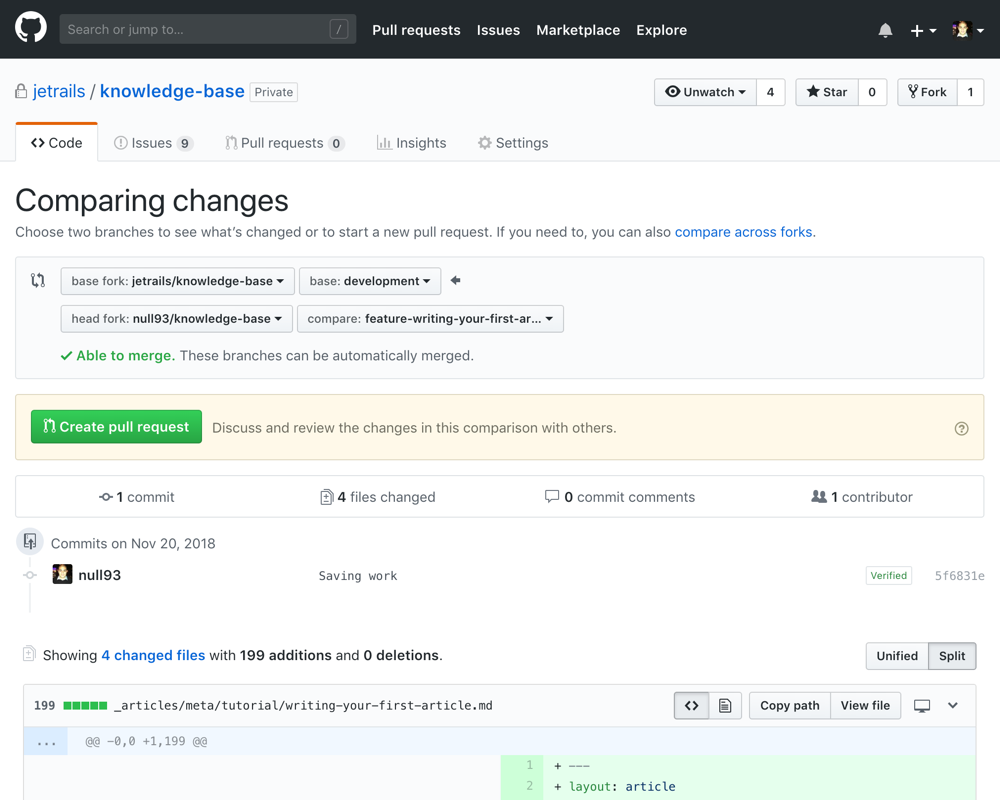
You are now ready to create a pull request with the original repository and request your branch to be merged into the original knowledge base staging branch. First, visit the knowledge base repository:
Click on the Pull requests tab:

Click on the New pull request button:
You want to then click on the compare across forks link:
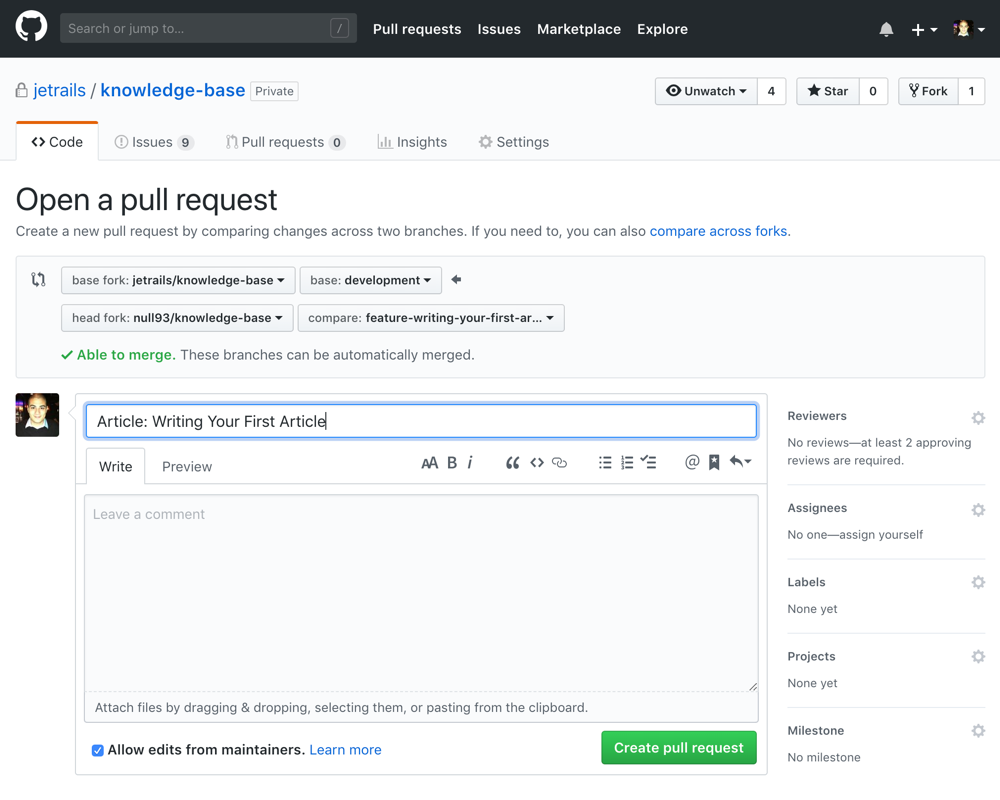
Above, you will see that the base branch is the staging branch at jetrails/knowledge-base and the head branch is feature-writing-your-first-article at null93/knowledge-base. Also notice that the name of the pull request is the article name, prefaced with “Article: “.
There is no need to Included a description, unless you would like to convey any additional information to the reviewers. Once complete, press the Create pull request button.
Next steps
Your article will be reviewed as part of the approval process. Stay tuned, as the reviewers might request changes to your pull request.