About
The JetRails extension for Varnish® is a powerful tool that enables developers and Magento 2 site maintainers to manage Varnish Cache™ in a more effective manner. This extension supports both Magento 2 Open Source (CE) and Magento 2 Commerce (EE). There is support for environments with multiple Varnish servers configured. Features include strategies for purging all cache, specific URLs, based on Magento Cache-Tags, and even the ability to interface with Varnish directly and supply a custom purge rule. Varnish Cache™ can bypass certain pages from being cached by setting rules based on URL path, Magento’s route/module/controller/action, wildcard patterns, and RegExp patterns. Additionally, verbose HTTP response headers can be turned on to debug your store’s Varnish configuration whilst it is in development.
Disclaimer: All product and company names are trademarks™ or registered® trademarks of their respective holders. Use of them does not imply any affiliation with or endorsement by them. Varnish is a registered trademark of Varnish Software AB and its affiliates. Magento and their logo are trademarks of Magento.
The MIT license
The JetRails Magento 2 extension for Varnish is licensed under the MIT license. If you would like to learn more, please see the details of the MIT license.
Installation process
Run the following to install this extension:
$ composer require jetrails/magento2-varnish
$ php bin/magento setup:upgrade
$ php bin/magento cache:flush
Note: An additional step of logging out of your Magento’s backend may be required in order to refresh any altered ACL resources that the newly installed extension could have caused.
Setup process
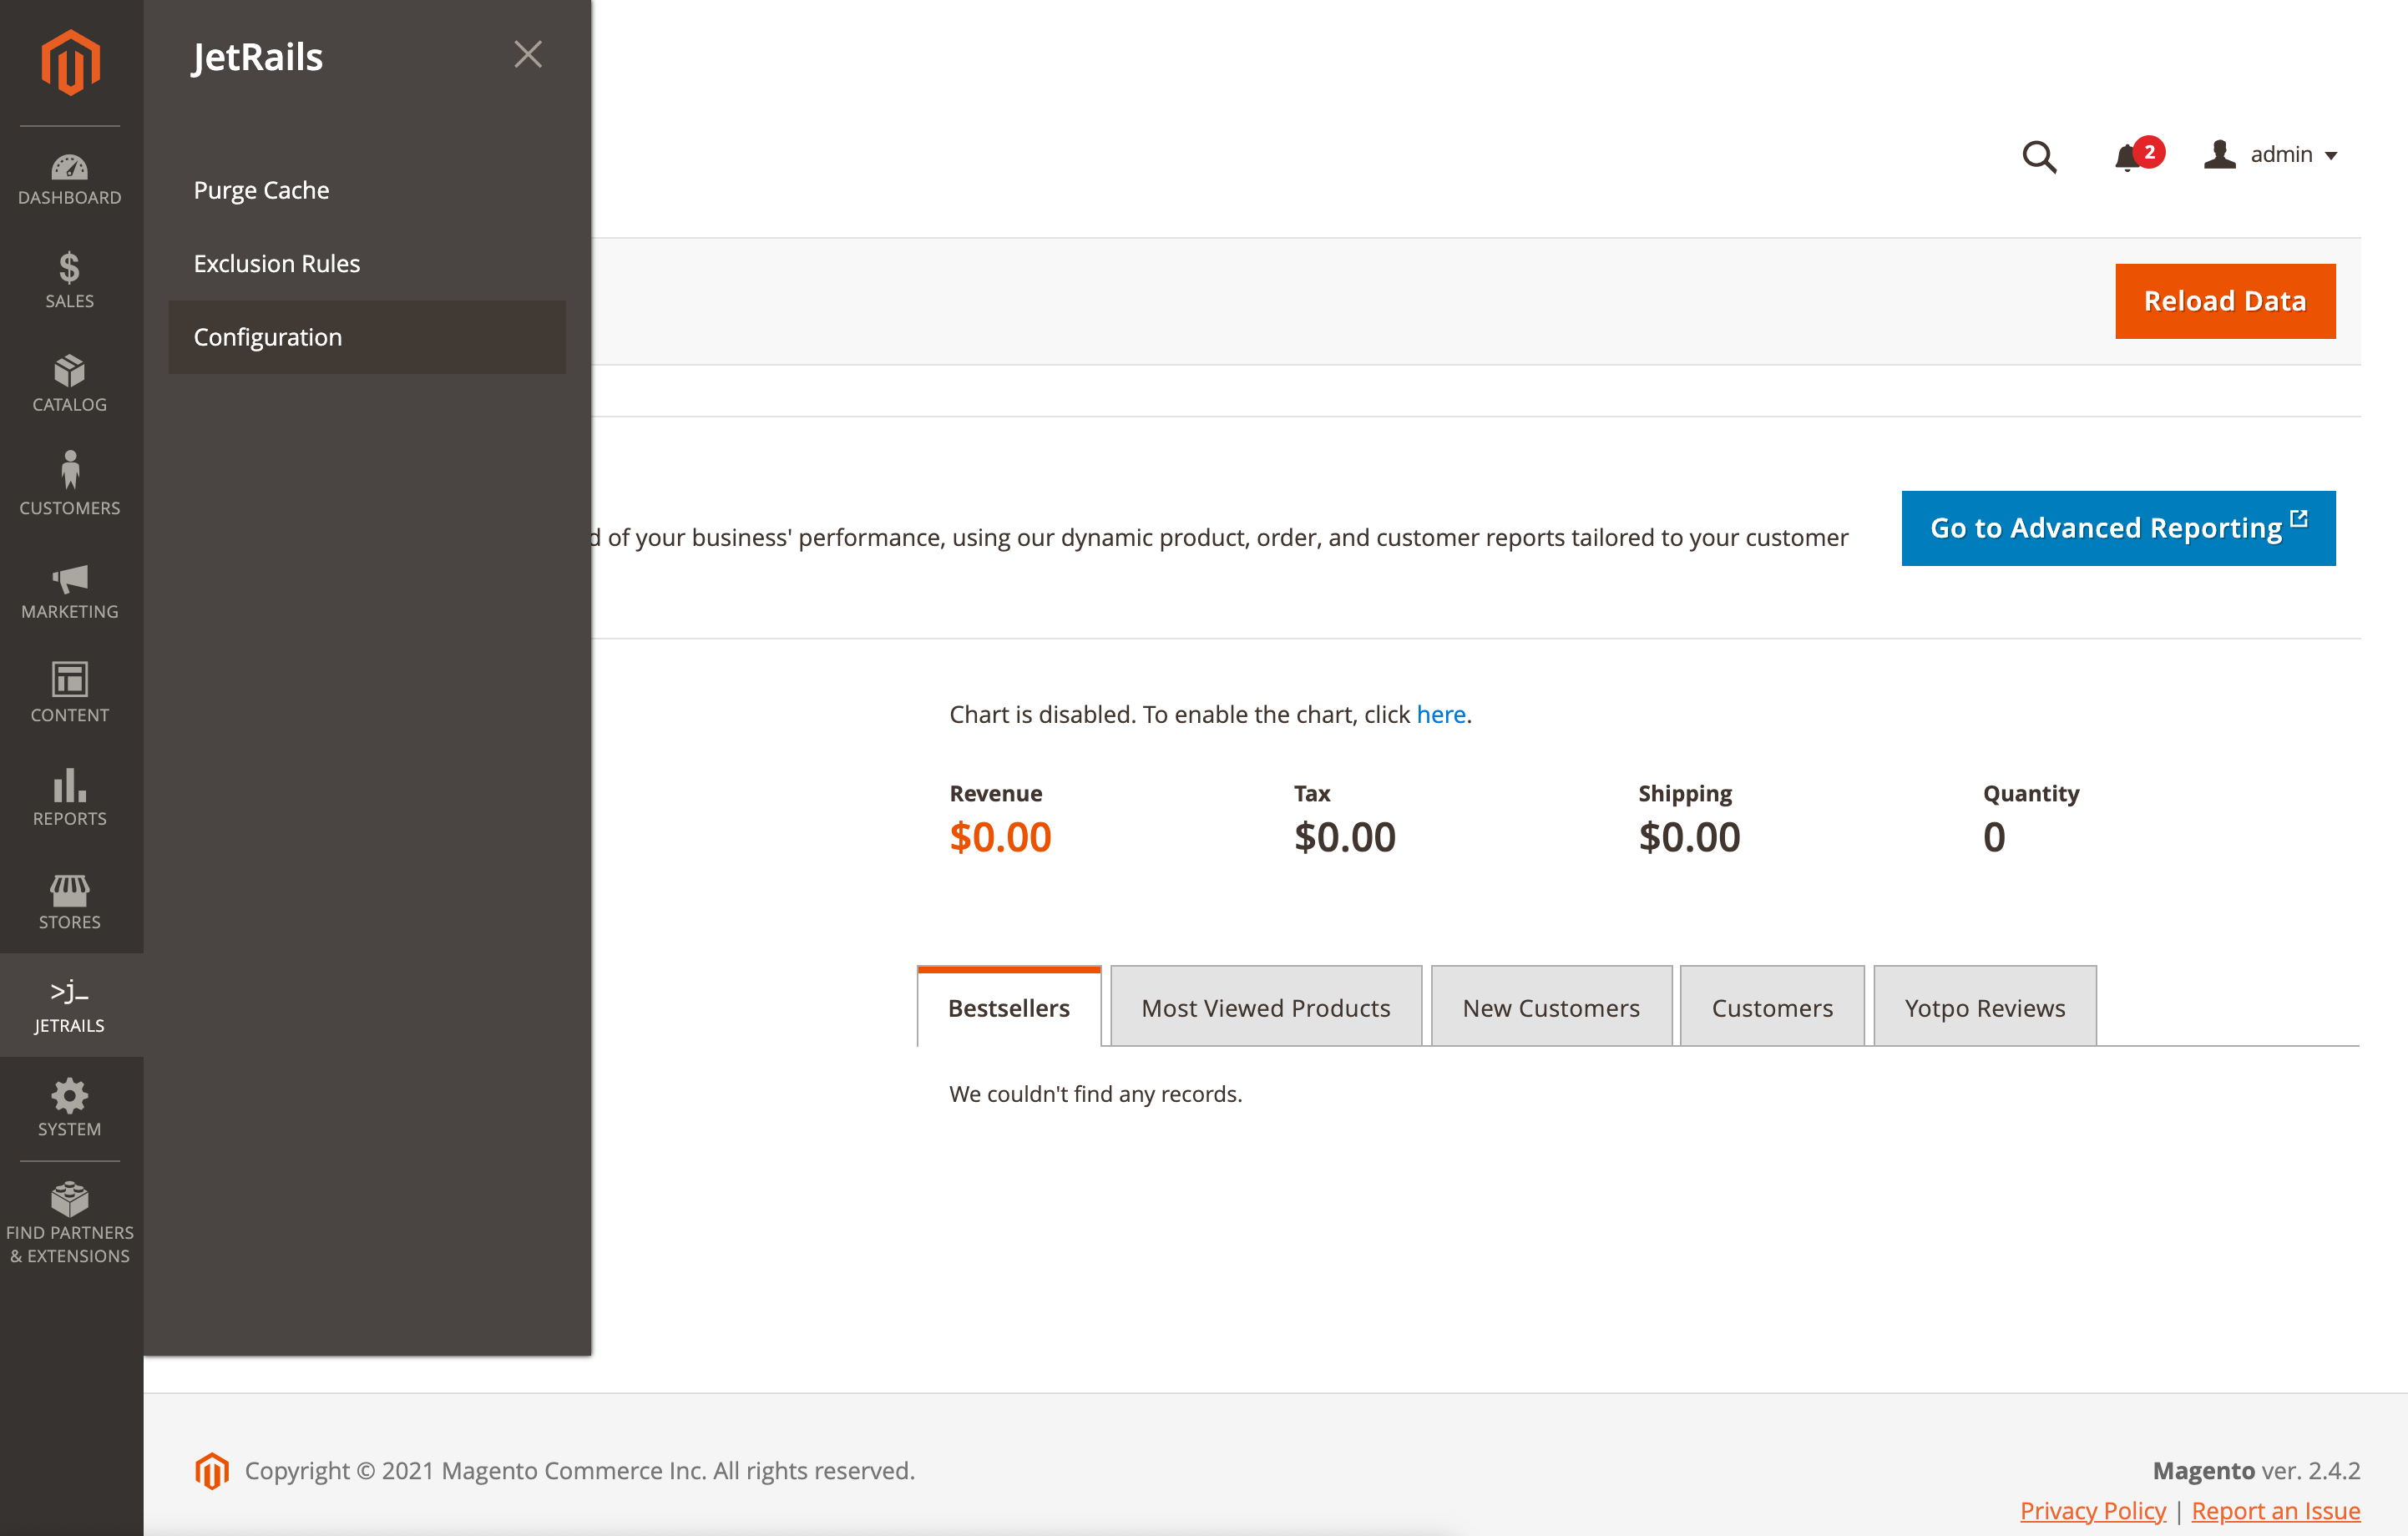
Once the extension is installed, you can use the JetRails menu icon to navigate to JetRails > Varnish Cache > Configuration. You can use the information there to configure Varnish.
There are essentially three steps that need to be taken:
- Set caching application to Varnish
- Configure Varnish server host and port
- Install VCL config file on Varnish server
There are multiple ways of doing things and that is why each way is outlined in detail. You can find out more by clicking on each card’s tray label. This will reveal detailed instructions on how to achieve each step.
TLDR;
$ php bin/magento config:set system/full_page_cache/caching_application 2
$ php bin/magento setup:config:set --http-cache-hosts=localhost:80
$ php bin/magento varnish:vcl:generate \
    --export-version=6 \
    --access-list="127.0.0.1" \
    --backend-host="localhost" \
    --backend-port=8080 \
    --grace-period=300 \
    > /etc/varnish/default.vcl
$ jrctl service reload varnish
The above assumes that Varnish is running on localhost:80 and the backend is reachable on localhost:8080.
Note: Starting in version 3 of the module, you will need to run an additional command to generate a
default.custom.vclfile. This allows you to make changes to the vcl by using the hooking system that is available in version 3 of the module. All custom changes to the vcl will live indefault.custom.vcl, while thedefault.vclfile can be freely updated when Magento updates it upstream.
$ php bin/magento varnish:vcl:generate-custom \
    --export-version=6 \
    > /etc/varnish/default.custom.vcl
Using debug mode
When Debug Mode is enabled, an extra HTTP parameter will be sent in the response header of every page. This parameter will be identified as JR-Hit-Miss and its value will always be either HIT or MISS. The value signifies whether the visit to the page resulted in a HIT in Varnish Cache™ or if it resulted in a MISS in Varnish Cache™.
Toggle debug mode
To enable or disable Debug Mode, log into your Magento Backend and navigate to JetRails > Varnish Cache > Configuration using the menu. Scrolling down to the Debug Mode card, you can either click the Enable or Disable button to toggle debug mode.
Inspecting Varnish Cache™ status while in debug mode
Using Google Chrome, open the Developer Tools panel by clicking on the three dots on the top right of the browser window. Using the menu, click on More Tools > Developer Tools. Once the developer tools panel opens, visit the Network tab. Once you refresh the page, you will see every resource that loads for the current page you are viewing. The very first item will be the request for the page itself. If you click on that item, you will see that more information is displayed. Looking under the Response Headers under the Headers tab, you will see that the JR-Hit-Miss parameter will be defined. You will also see headers that identify the current URL, path, and route. This is to make exclusion rules easier to write and is only shown when in debug mode. Additionally, if there was a cache miss that was caused by a cache exclusion rule, it will show up as a header stating what type of exclusion caused it to not cache (JR-Exclude-By) as well as the actual rule itself (JR-Exclude-With).
Purge Varnish Cache™
Once this extension is configured correctly with Varnish, it gives you the ability to purge your Varnish Cache™. You can accomplish this by going to JetRails > Varnish Cache > Purge Cache. There you will find four purge methods:
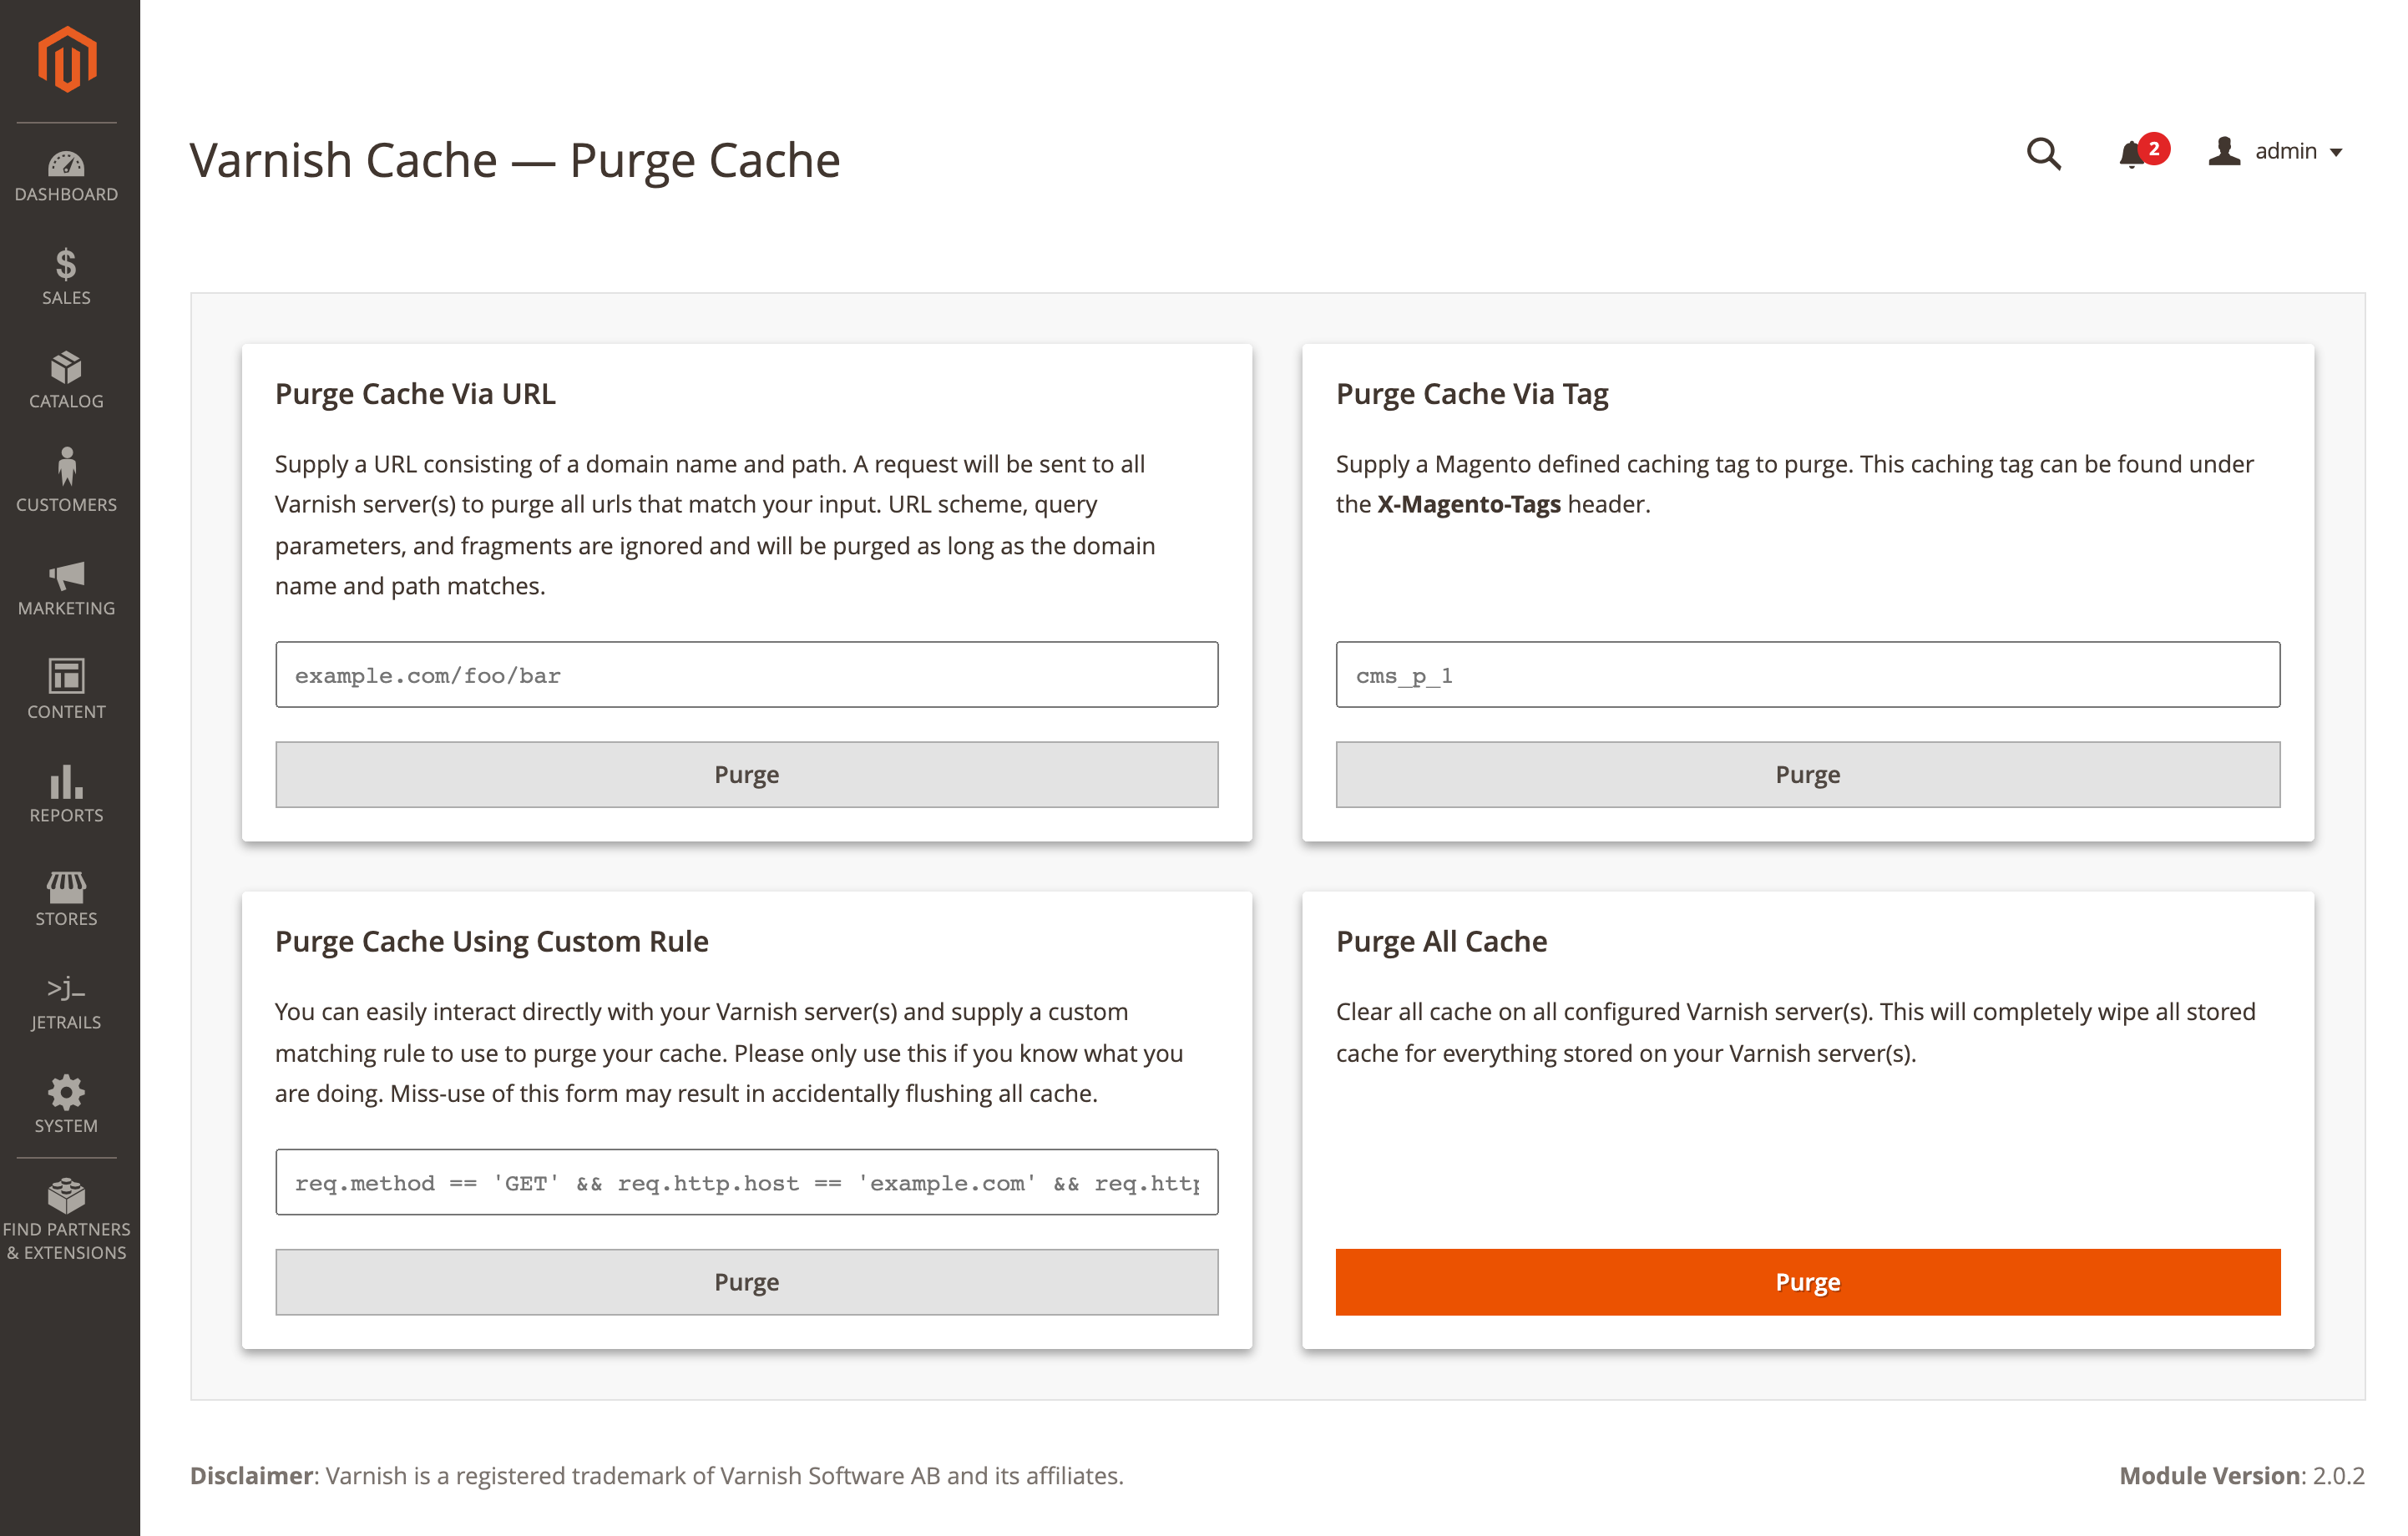
Purge Cache Via URL
Supply a URL consisting of a domain name and path. A request will be sent to the Varnish server(s) to purge all urls that match your input. URL scheme, query parameters, and fragments are ignored and will be purged as long as the domain name and path match.
Purge Cache Via Tag
Supply a Magento defined caching tag to purge. This caching tag can be found under the X-Magento-Tags header.
Purge Cache Using Custom Rule
You can easily interact directly with your Varnish server(s) and supply a custom matching rule to use to purge your cache. Please only use this if you are confident that you can set-up custom matching rules properly. Misuse of this form may result in accidentally flushing all cache.
Purge All Cache
Clear all cache on all configured Varnish server(s). This will completely wipe all stored cache for everything stored on your Varnish server(s).
Exclusion rules
If you wish to exclude certain pages from being cached by Varnish, you can do so through this extension. After logging into your Magento backend, navigate to JetRails > Varnish Cache > Exclusion Rules. There are three ways you can exclude a page from being cached:
Excluded routes
This will mark a page as uncachable if its route/module/controller/action matches any of the saved patterns. The following formats are valid: [route]/[module]/[controller]/[action], [route]/[module]/[controller], [route]/[module], and [route]. Keep in mind, these rules are left-associative so having an entry like: cms will exclude all pages that are under the cms route no matter the module, controller, or action. If an exclusion rule successfully worked, then you should see that JR-Hit-Miss will be set to MISS and JR-Exclude-With will be route and JR-Exclude-By will be the entry that matched.
Exclude paths (wildcard pattern)
This exclusion type is very similar to excluding by paths except you are able to specify a wildcard in the path. A ** will match across path segments, while * will match across the path segment it resides in. With the following pattern, /product/**/color-*, notice that the following paths will match: /product/foo/color-blue, /product/foo/bar/color-red, /product/foo/bar/baz/color-white. You can confirm that this path exclusion rule is working by enabling debug mode for this extension, opening up the Chrome Developer Tools to analyze the response headers. If this exclusion rule successfully worked, then you should see that JR-Hit-Miss will be set to MISS and JR-Exclude-With will be wildcard and JR-Exclude-By will be the pattern that matched.
Exclude URL (regexp pattern)
Regular expressions will match across a whole URL. This includes the schema, domain, path, & query parameters. Entering in one pattern per line will enable you to exclude using multiple patterns. If the pattern is invalid, it will be removed when saving. With the following pattern, /[?&]no-cache$/im, you can access pages that are not cached by attaching the no-cache query parameter as the last or first and only parameter. You can confirm that this URL exclusion rule is working by enabling debug mode for this extension, opening up the Chrome Developer Tools to analyze the response headers. If this exclusion rule successfully worked, then you should see that JR-Hit-Miss will be set to MISS and JR-Exclude-With will be regexp and JR-Exclude-By will be the pattern that matched.
Note: Be mindful of overmatching, since it is easily possible to exclude all URLs with a single pattern. Use anchors (^$) when you can and try to be as specific as possible.
Magento CLI commands
This extension’s CLI commands can be executed through the Magento CLI binary. This can be achieved by going to your Magento installation directory and running the following command: php ./bin/magento <command>
Note: The
<command>in the snippet above should be substituted with one of the commands below.
varnish:purge:all
This command takes no parameters. If executed, it will purge all entries in cache from all configured Varnish servers. Example command is as follows:
$ php ./bin/magento varnish:purge:all
varnish:purge:custom <RULE>
Passing the RULE as the required parameter, will purge all entries in cache by interfacing with Varnish’s ban method directly. This is an advanced feature and should not be used unless you have an understanding about how Varnish’s ban method works. Here is an example purging all cache for example.com.
$ php ./bin/magento varnish:purge:custom "req.http.host == 'example.com'"
varnish:purge:tag <TAG>
Passing the Magento defined caching tag as the required parameter will purge all entries that Magento tagged with this value. This caching tag can be found under the X-Magento-Tags header.
$ php ./bin/magento varnish:purge:tag cms_p_1
varnish:purge:url <URL>
Supply a URL consisting of a domain name and path. A request will be sent to all Varnish server(s) to purge all URLs that match your input. URL scheme, query parameters, and fragments are ignored and will be purged as long as the domain name and path match.
$ php ./bin/magento varnish:purge:url example.com/foo/bar
varnish:vcl:generate
While this command existed with the default installation of Magento 2, this extension changes the output. It customizes the Varnish VCL file on the fly to add a richer set of features.
varnish:vcl:generate-custom
Will generate the default.custom.vcl file. This command will only need to be run the first time you setup the module. It goes through the default.vcl file and finds all the available hooks that can be used. They are all displayed in the output of this command with an empty body.
Additional support
For additional support or inquiries, please feel free to reach out to us by phone or email. Any found bugs or feature requests can also be communicated to us through email. Any and all feedback would be extremely valuable and appreciated.
Call us at 1(888) 997-2457 or send an email to [email protected].