About
As a CDN Technology Partner, Cloudflare brings security and acceleration enhancements to the JetRails Hosting Platform. We picked the most relevant features for online merchants and built them directly into your Magento Administrator Control Panel. Control and modify these powerful features without leaving your store’s admin portal: Global CDN Passthrough, DDoS Mitigation, Cache Purge, JS Minification and Image Optimization, and many more. This extension supports both Magento 1 Open Source (CE) and Magento 1 Commerce (EE). This extension was also built for Magento 2.
Disclaimer: All product and company names are trademarks™ or registered® trademarks of their respective holders. Use of them does not imply any affiliation with or endorsement by them. Cloudflare® and their logo are trademarks of Cloudflare. Magento® and their logo are trademarks of Magento.
The MIT license
The JetRails Magento 1 extension for Cloudflare is licensed under the MIT license. If you would like to learn more, please see the details of the MIT license.
Installation process
This extension’s installation process is very simple. You can download the latest version of the extension from our Github repository’s releases page. Make sure to download the asset with the tgz extension. In order to install this extension, make sure that you have access to the filesystem where your Magento installation exists. The following instructions assumes that the reader of this documentation has working knowledge of how to interact with a command line interface. Some additional assumptions are presumed: Magento installation lives in /var/www/html, and extension archive file was copied onto the server where your Magento installation exists and resides in /home.
Log into server
For this example, we will assume that you have SSH access to the server where your Magento installation can be found.
Copy extension to Magento installation folder
$ cp /home/JetRails_Cloudflare-1.0.0.tgz /var/www/html
Install extension by extracting it into the Magento installation
$ cd /var/www/html
$ tar -xvf JetRails_Cloudflare-1.0.0.tgz
Log into Magento backend and flush cache storage
This can be done by looking under System > Cache Management and clicking on Flush Cache Storage.
Note: An additional step of logging out of your Magento’s backend may be required in order to refresh any altered ACL resources that the newly installed extension could have caused.
Setup process
Once the extension is installed, the Cloudflare dashboard can be found in Magento’s backend with the use of the menu by navigating to JetRails > Cloudflare Dashboard.
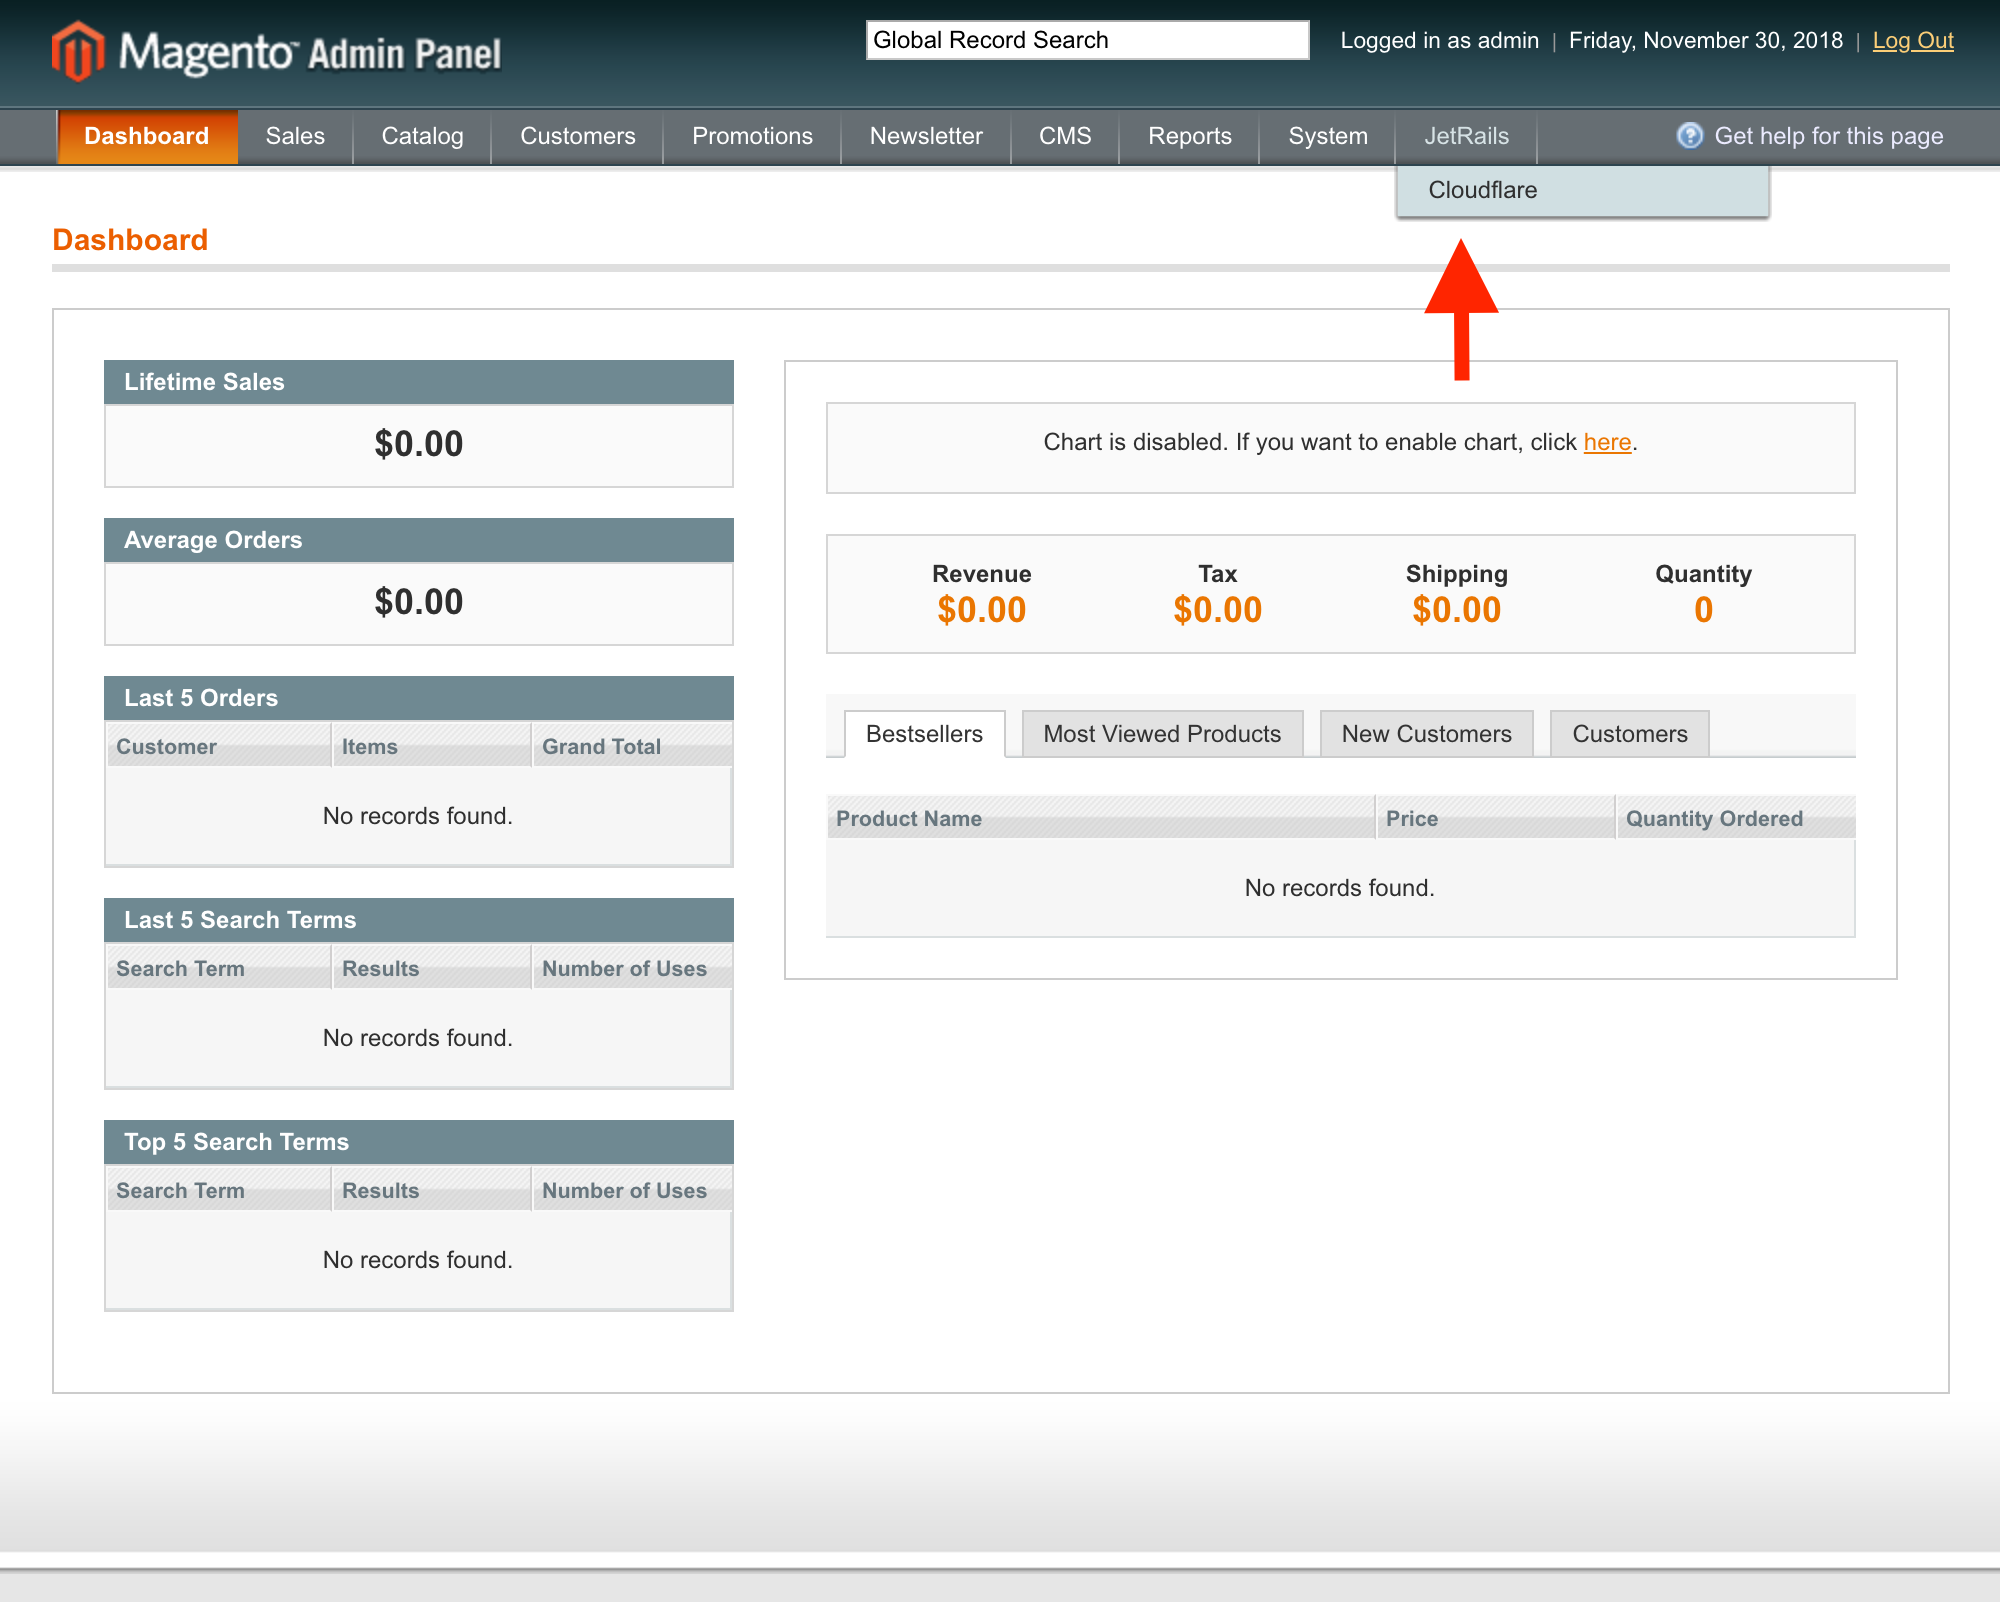
There you will be greeted with a configuration form which will look similar to the one found below.
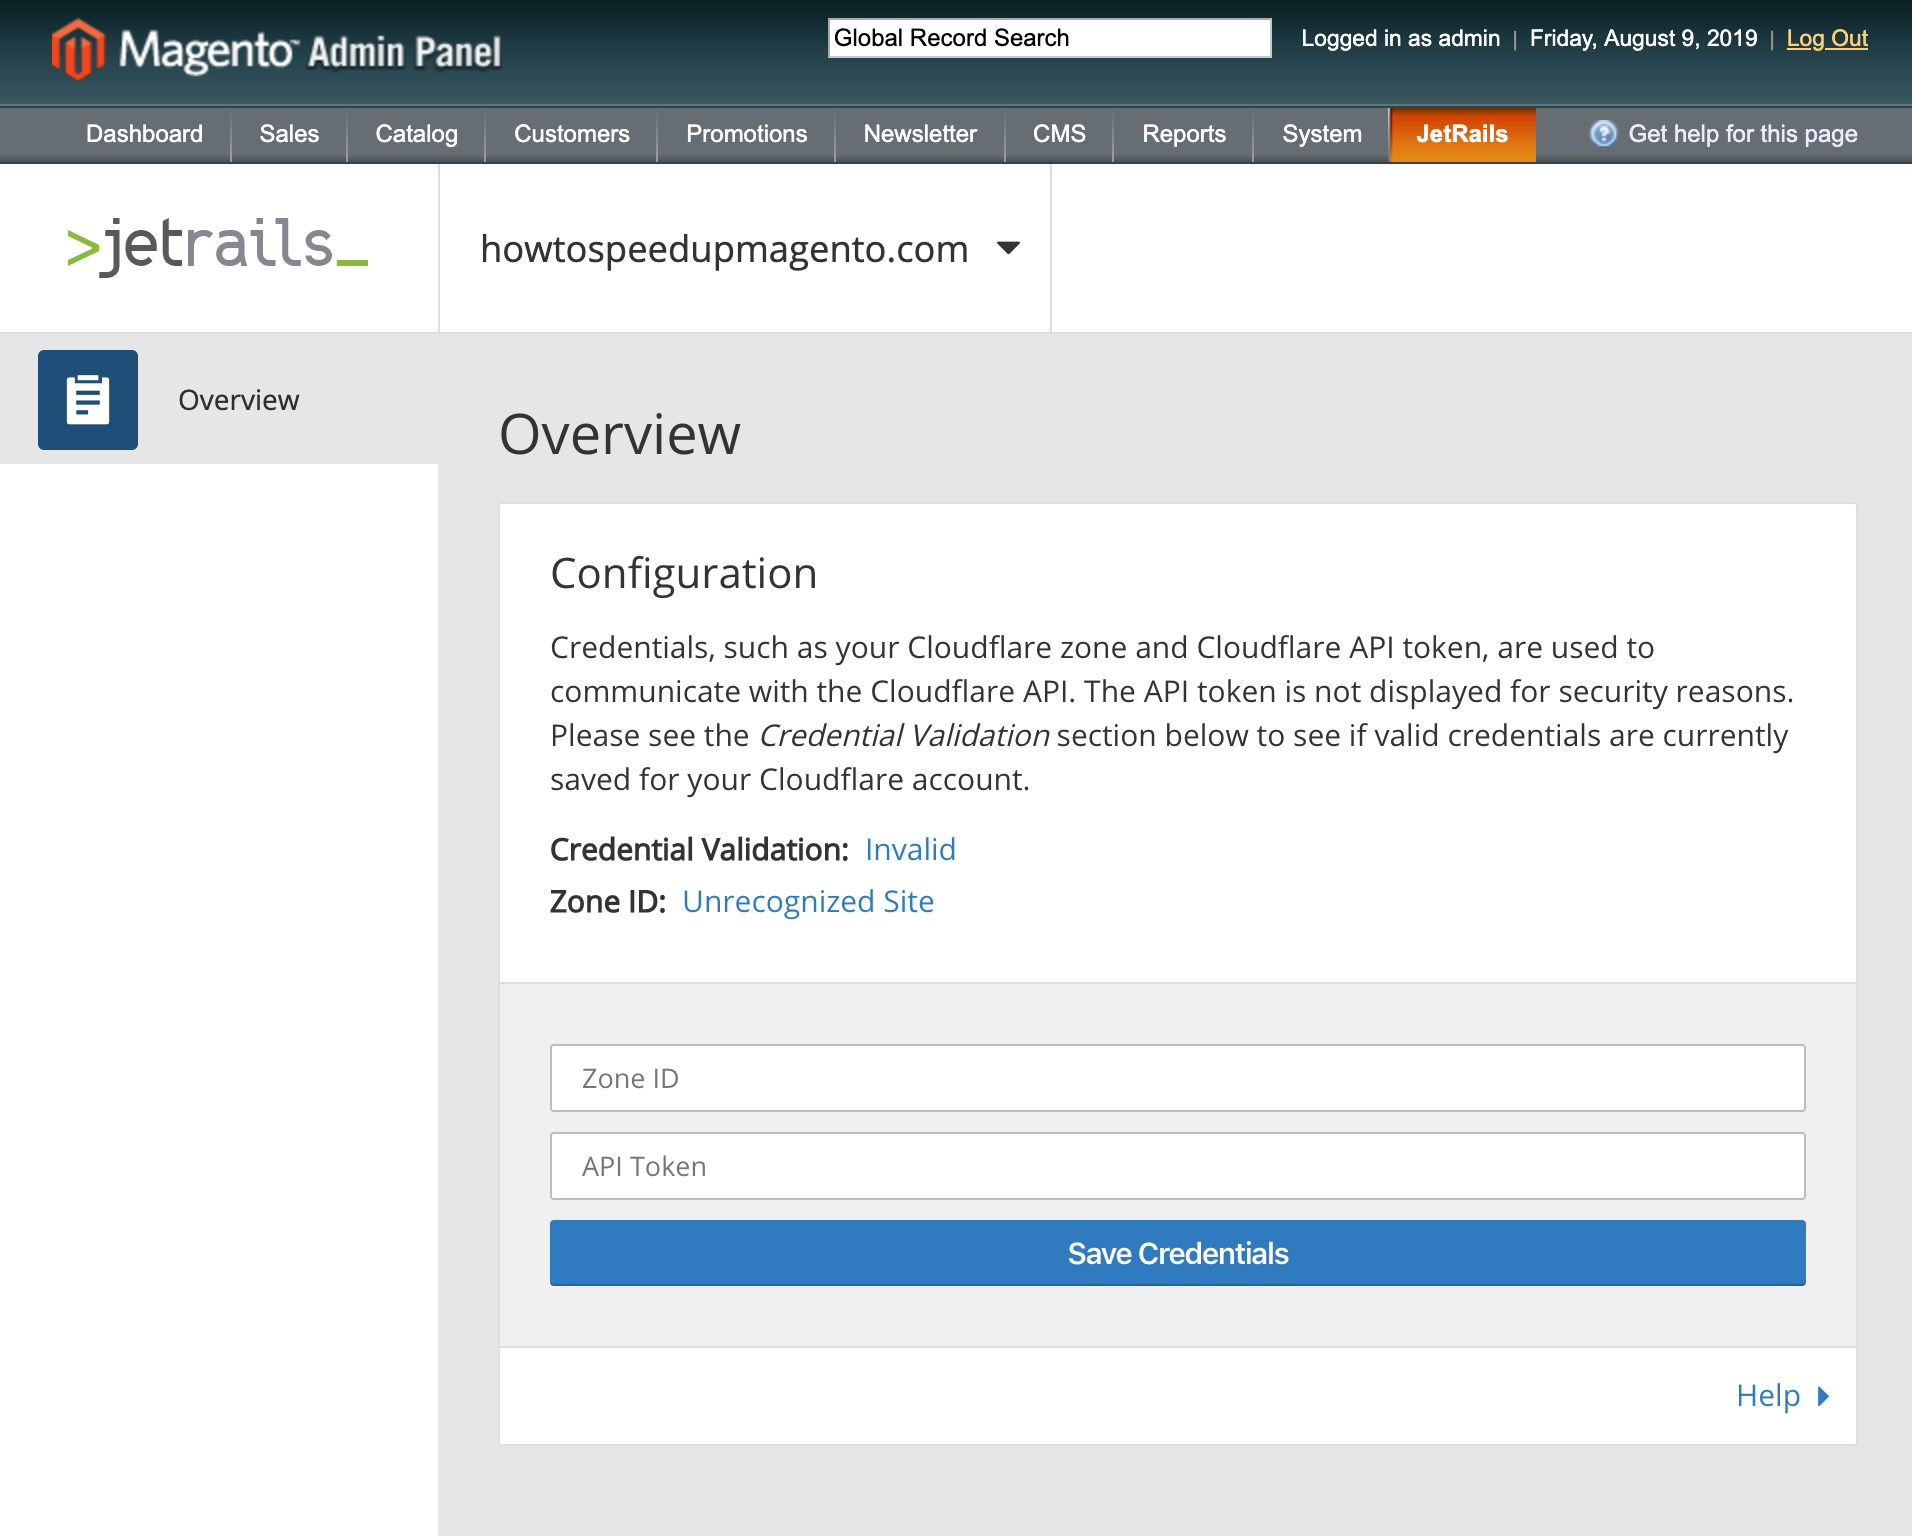
In order for this extension to work, access to Cloudflare’s API must be configured. The text box labeled Zone ID should contain the store view’s domain name’s zone id. This can be found in Cloudflare’s dashboard.
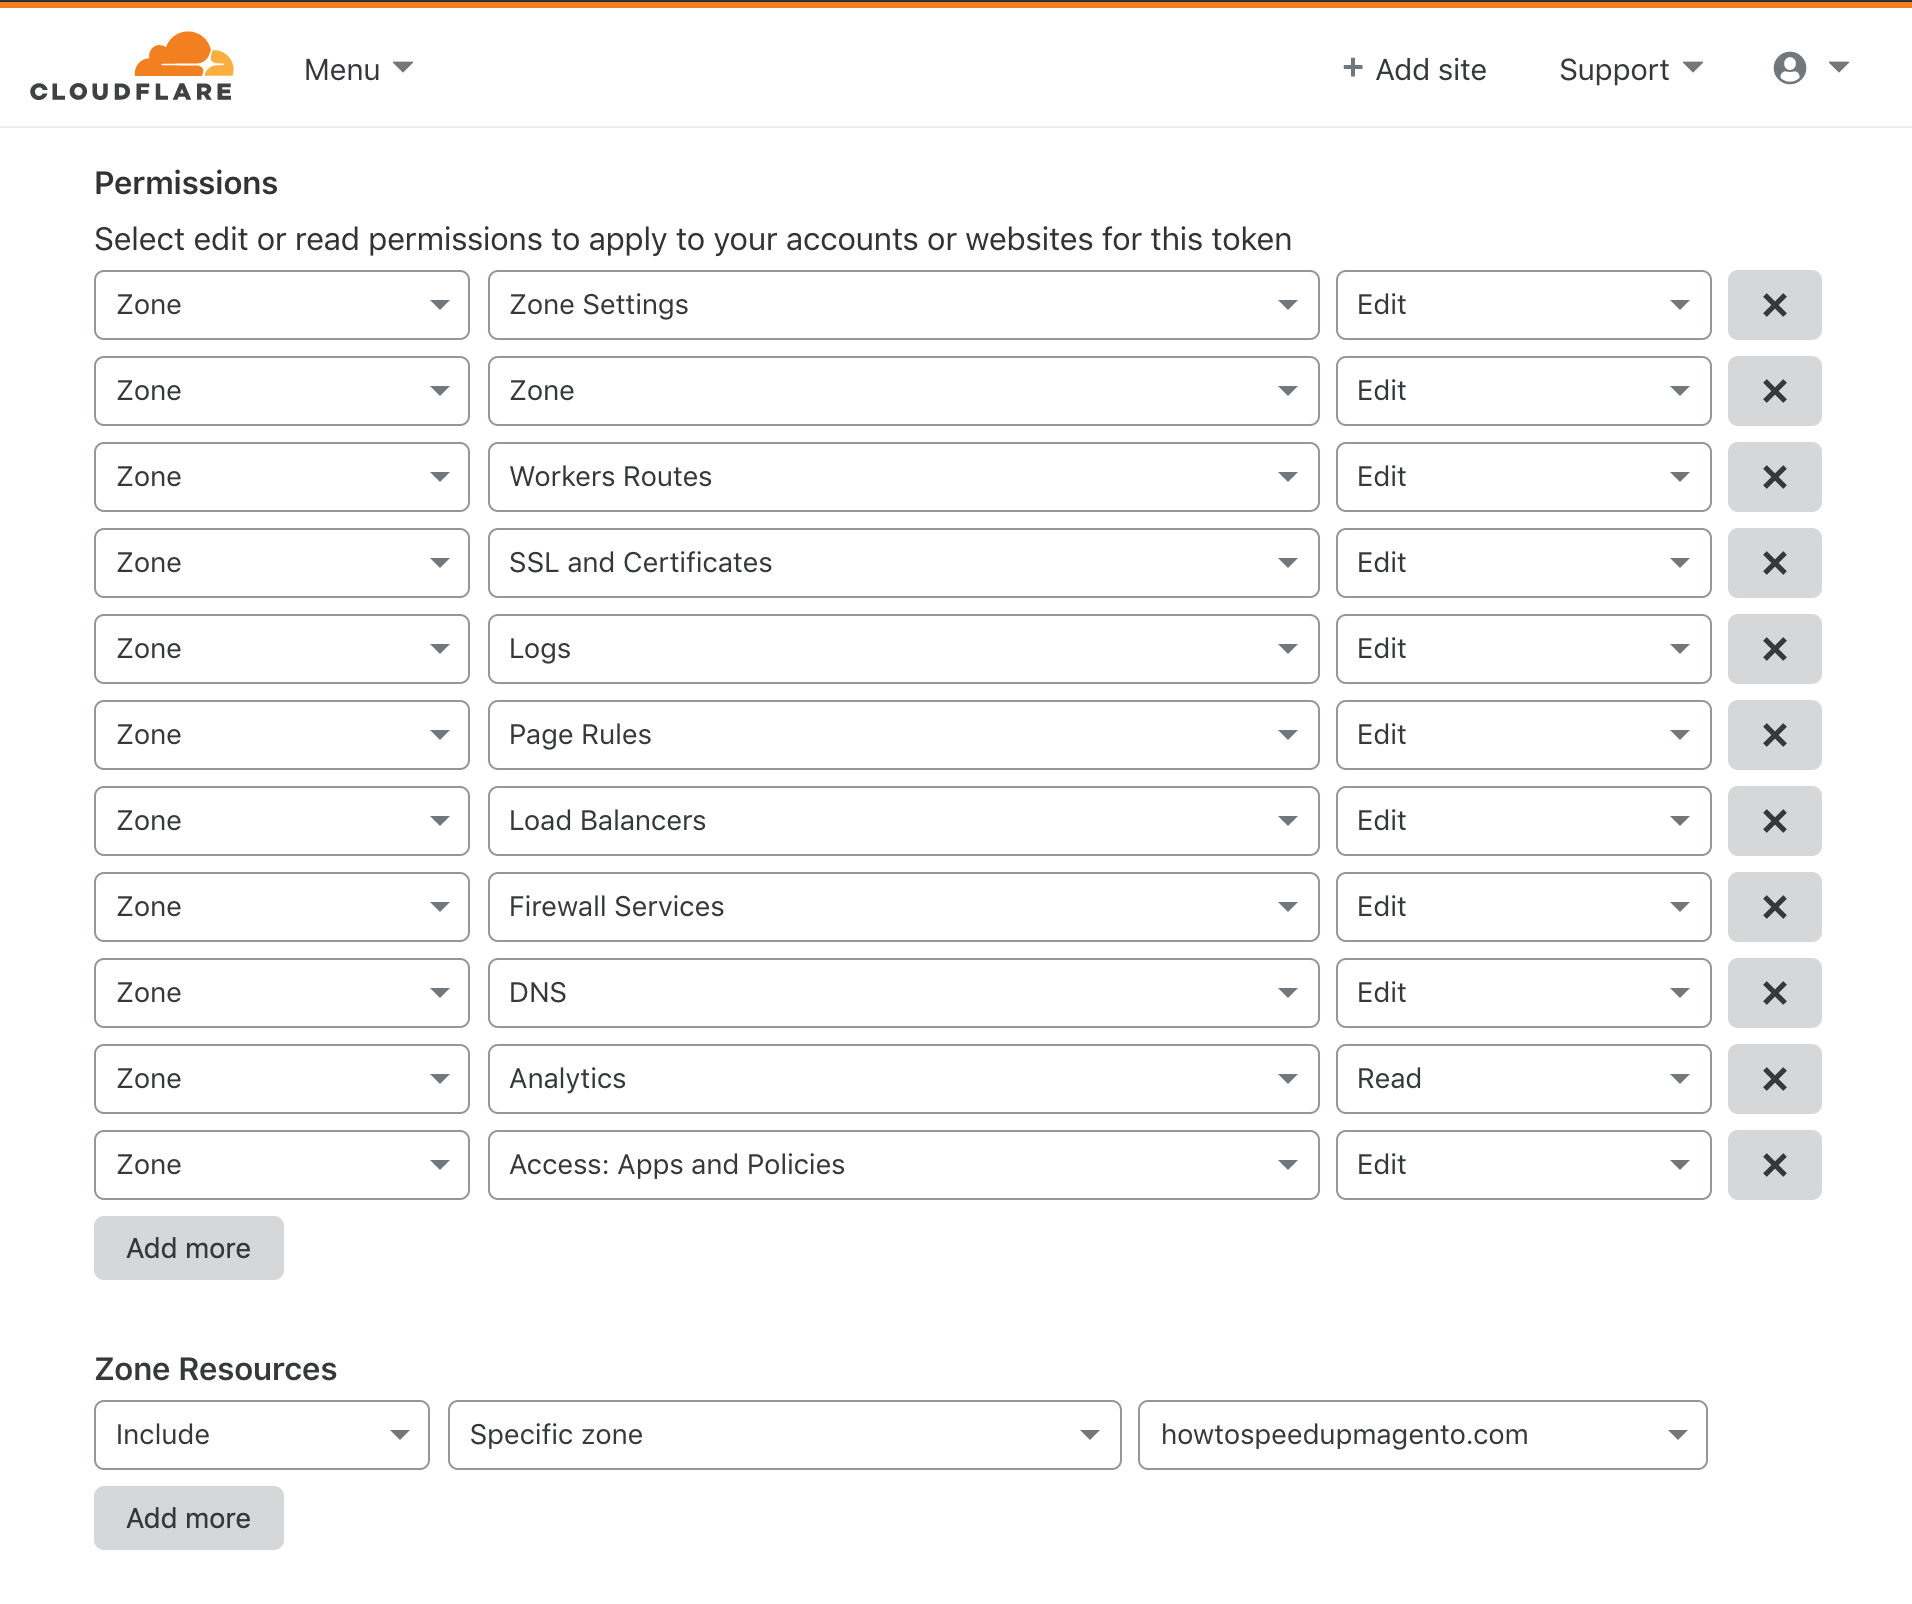
The text box labeled API Token should contain an API token that is pre-configured with Cloudflare’s Token API. For more information about creating an API Token, please refer to Cloudflare’s documentation. See image below for recommended configuration.
Note: These credentials are not the Account API Key that is found on the same page below the API Token section.
Using the dashboard
The Cloudflare dashboard can be found by navigating to JetRails > Cloudflare Dashboard with the use of the menu in the Magento backend.

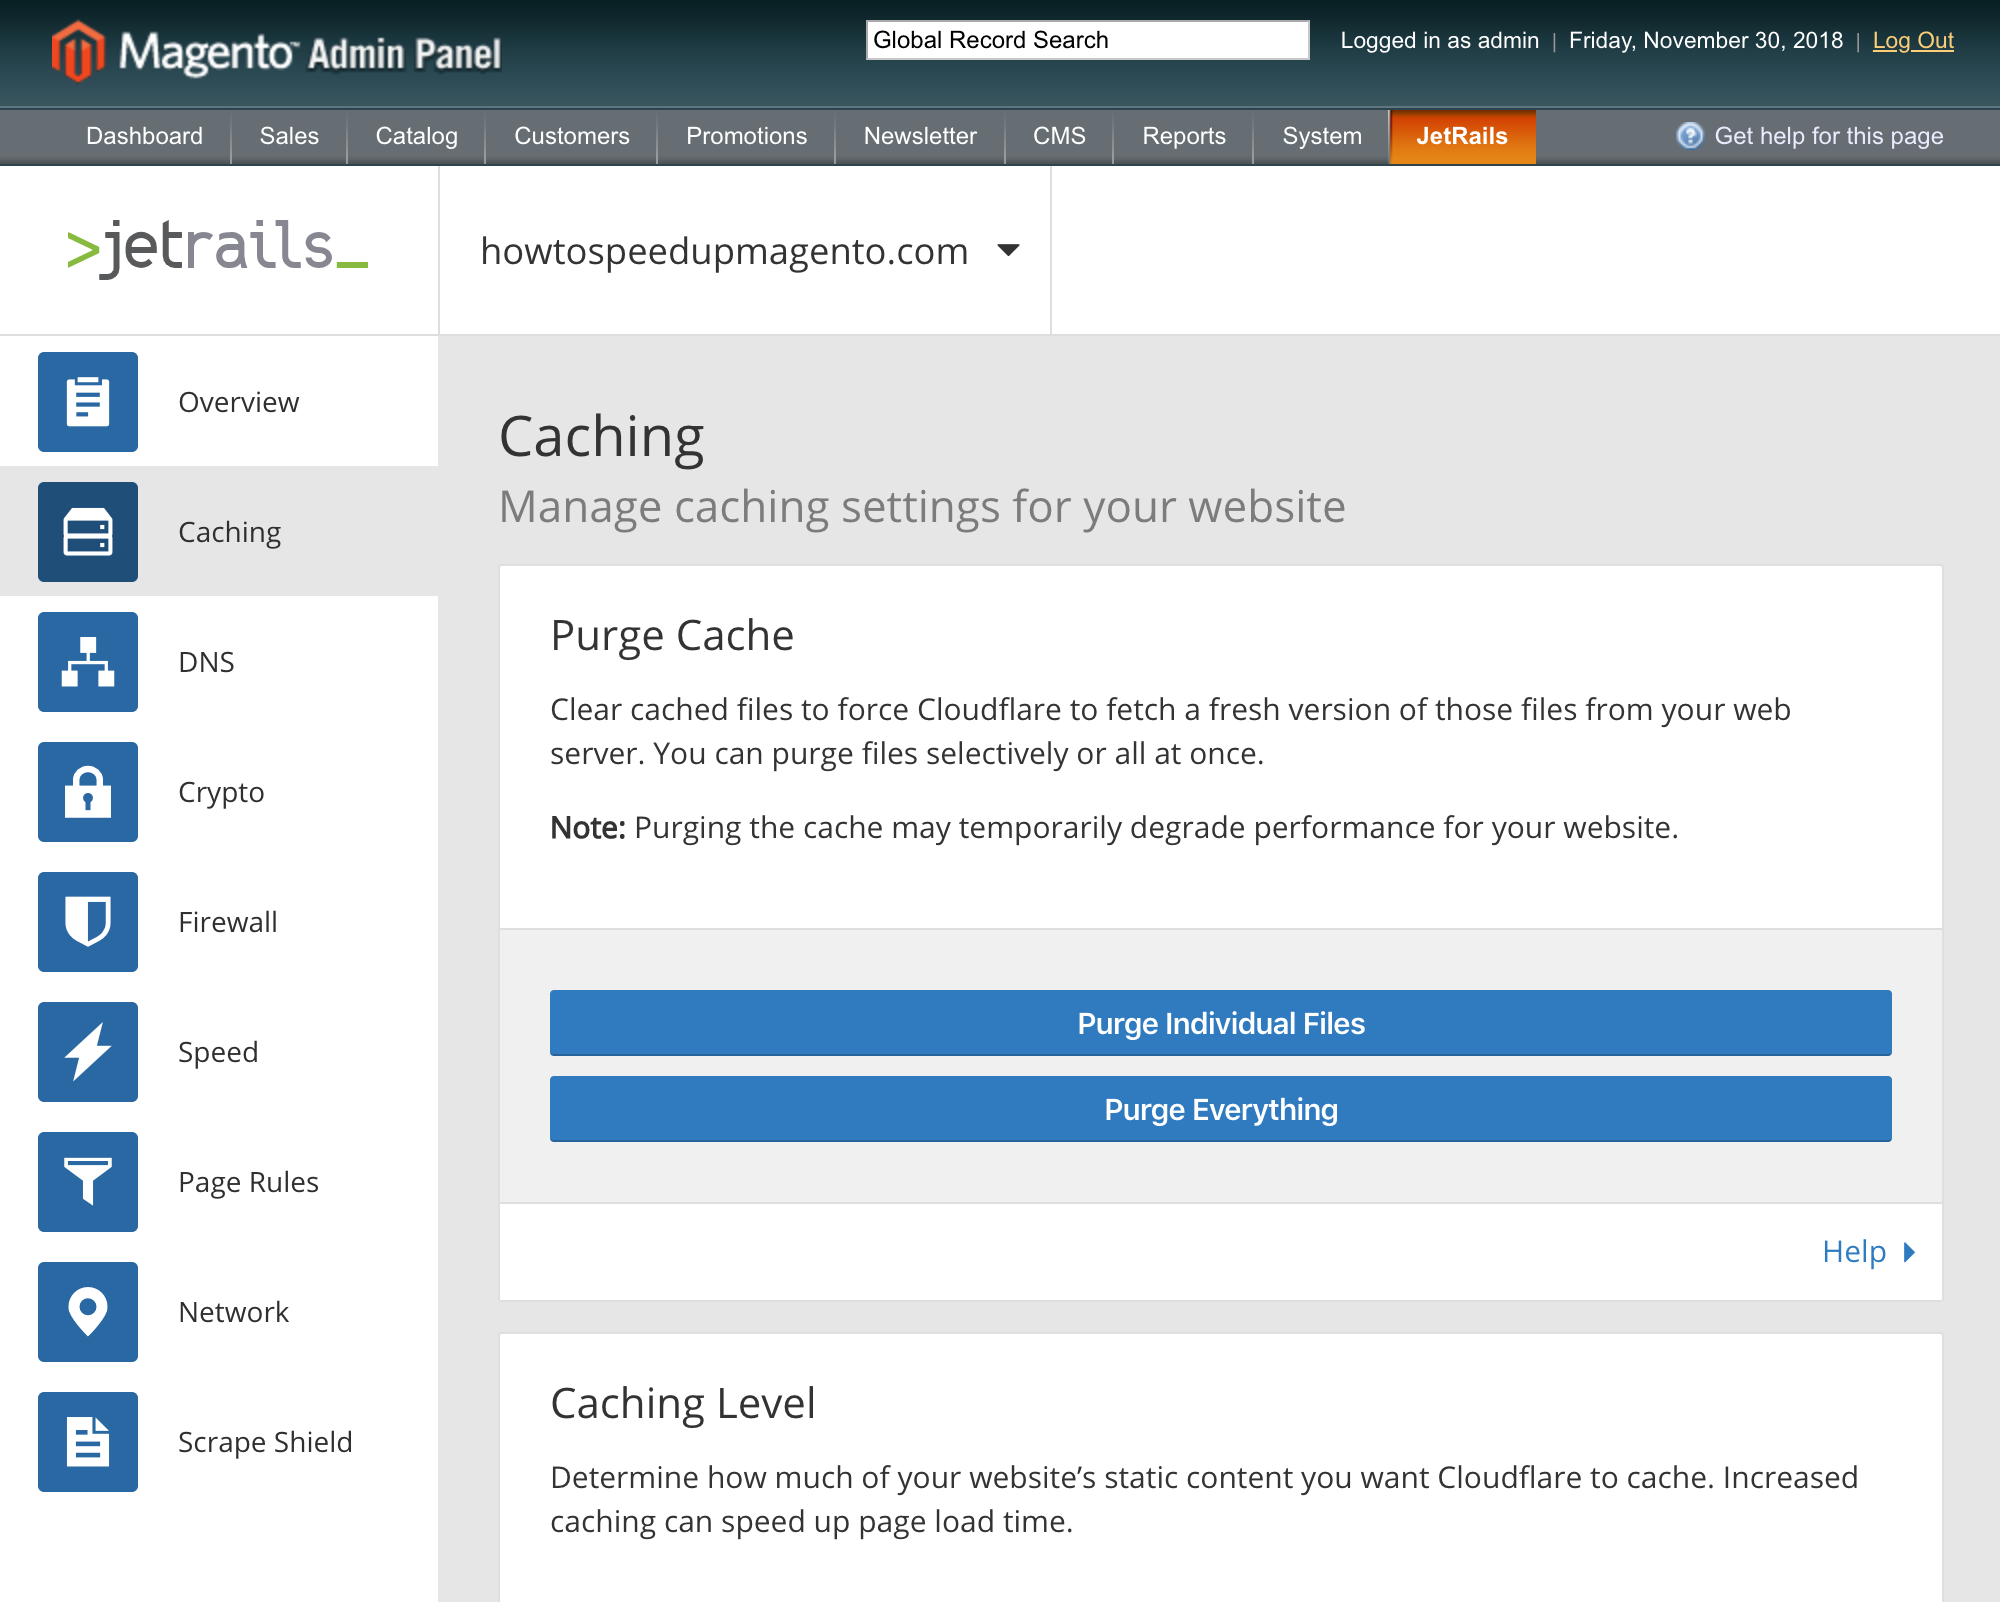
Assuming that the steps in the setup process were completed, you will be greeted with an array of tabs on the left side of the page. Otherwise, you will only be able to see the Overview tab, in which case you should go through the proper steps to setup the extension. This extension mimics as much functionality from Cloudflare as it can with more features and sections on their way.
Multi-store support
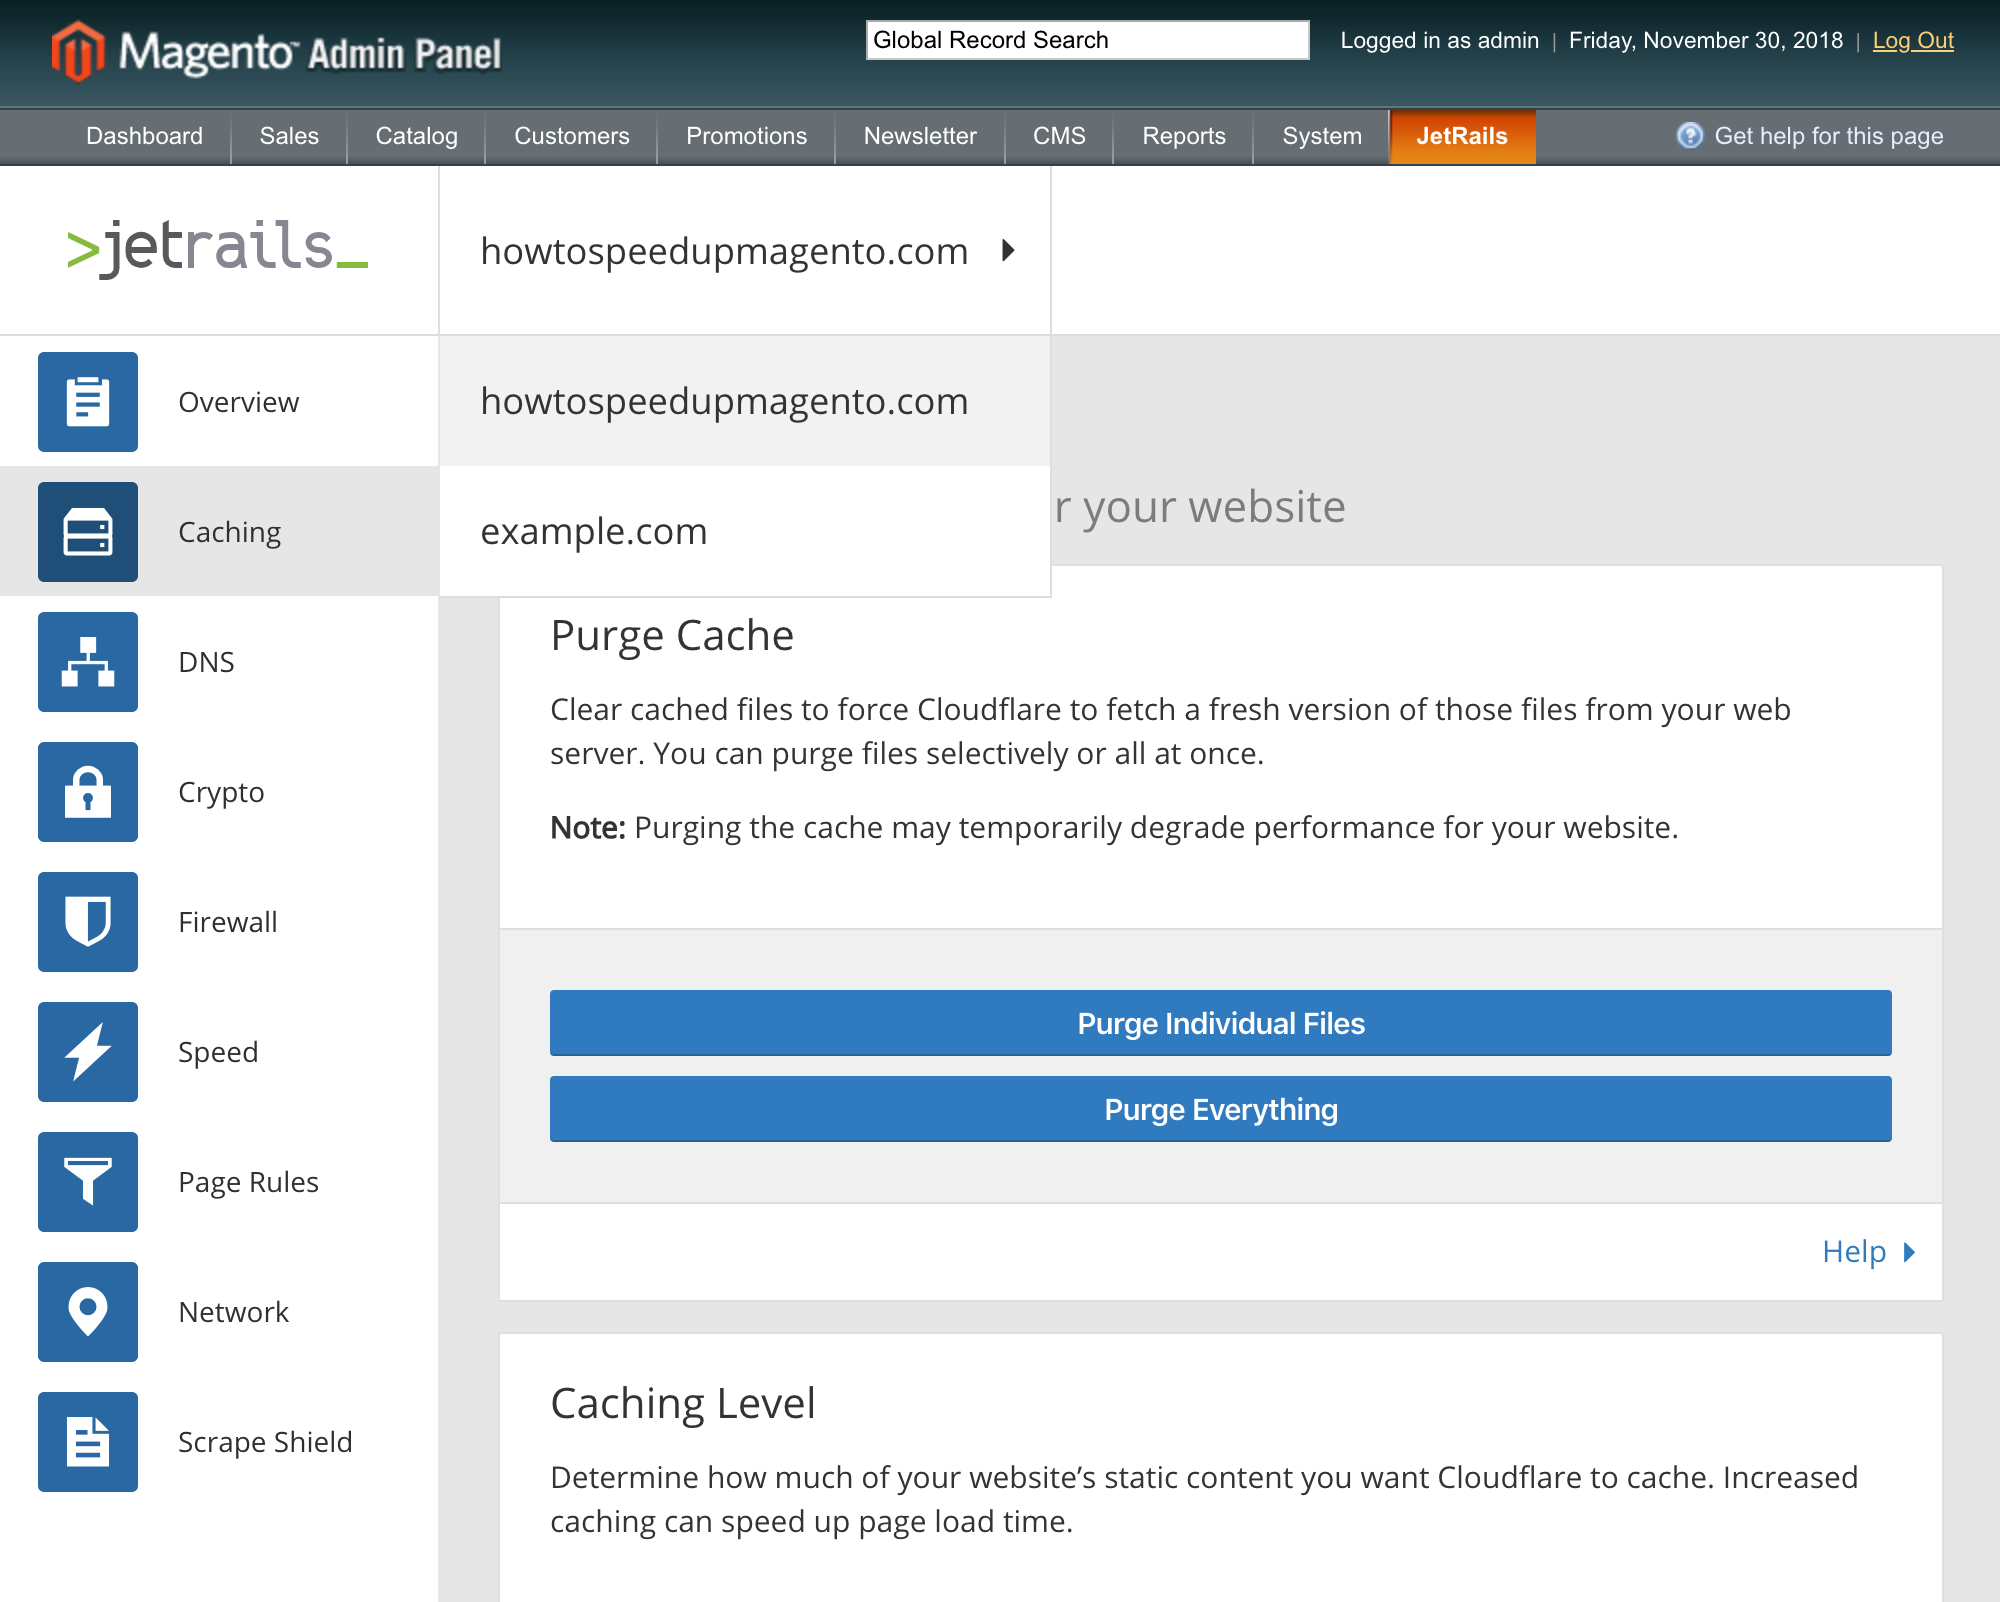
Our extension supports multi-store setups within Magento. While on the Cloudflare dashboard page, the currently selected domain name will be present to the right of the JetRails logo. When hovering over the domain name, there will be a drop down populated with all the domain names that are present in your Magento setup. By simply clicking on the domain name you want to use, you will be able to change the scope of the dashboard to configure settings related to said domain name. Please note that this implies that setup for the new domain name is required. A new set of credentials including a zone id and an API token will need to be supplied.
Restrict access using ACLs
Every card like section found under every tab of the Cloudflare Dashboard is assigned it’s own resource within the Magento ACL system. This means that permission to view and use every card like section can be delegated separately based on which role a user is assigned. An example case where this would be useful is if one had a developer role within the Magento ACL system and they wanted their developer to have permission to only toggle Developer Mode which lives under the Caching tab. The store administrator can simply achieve this by going to System > Permissions > Roles.
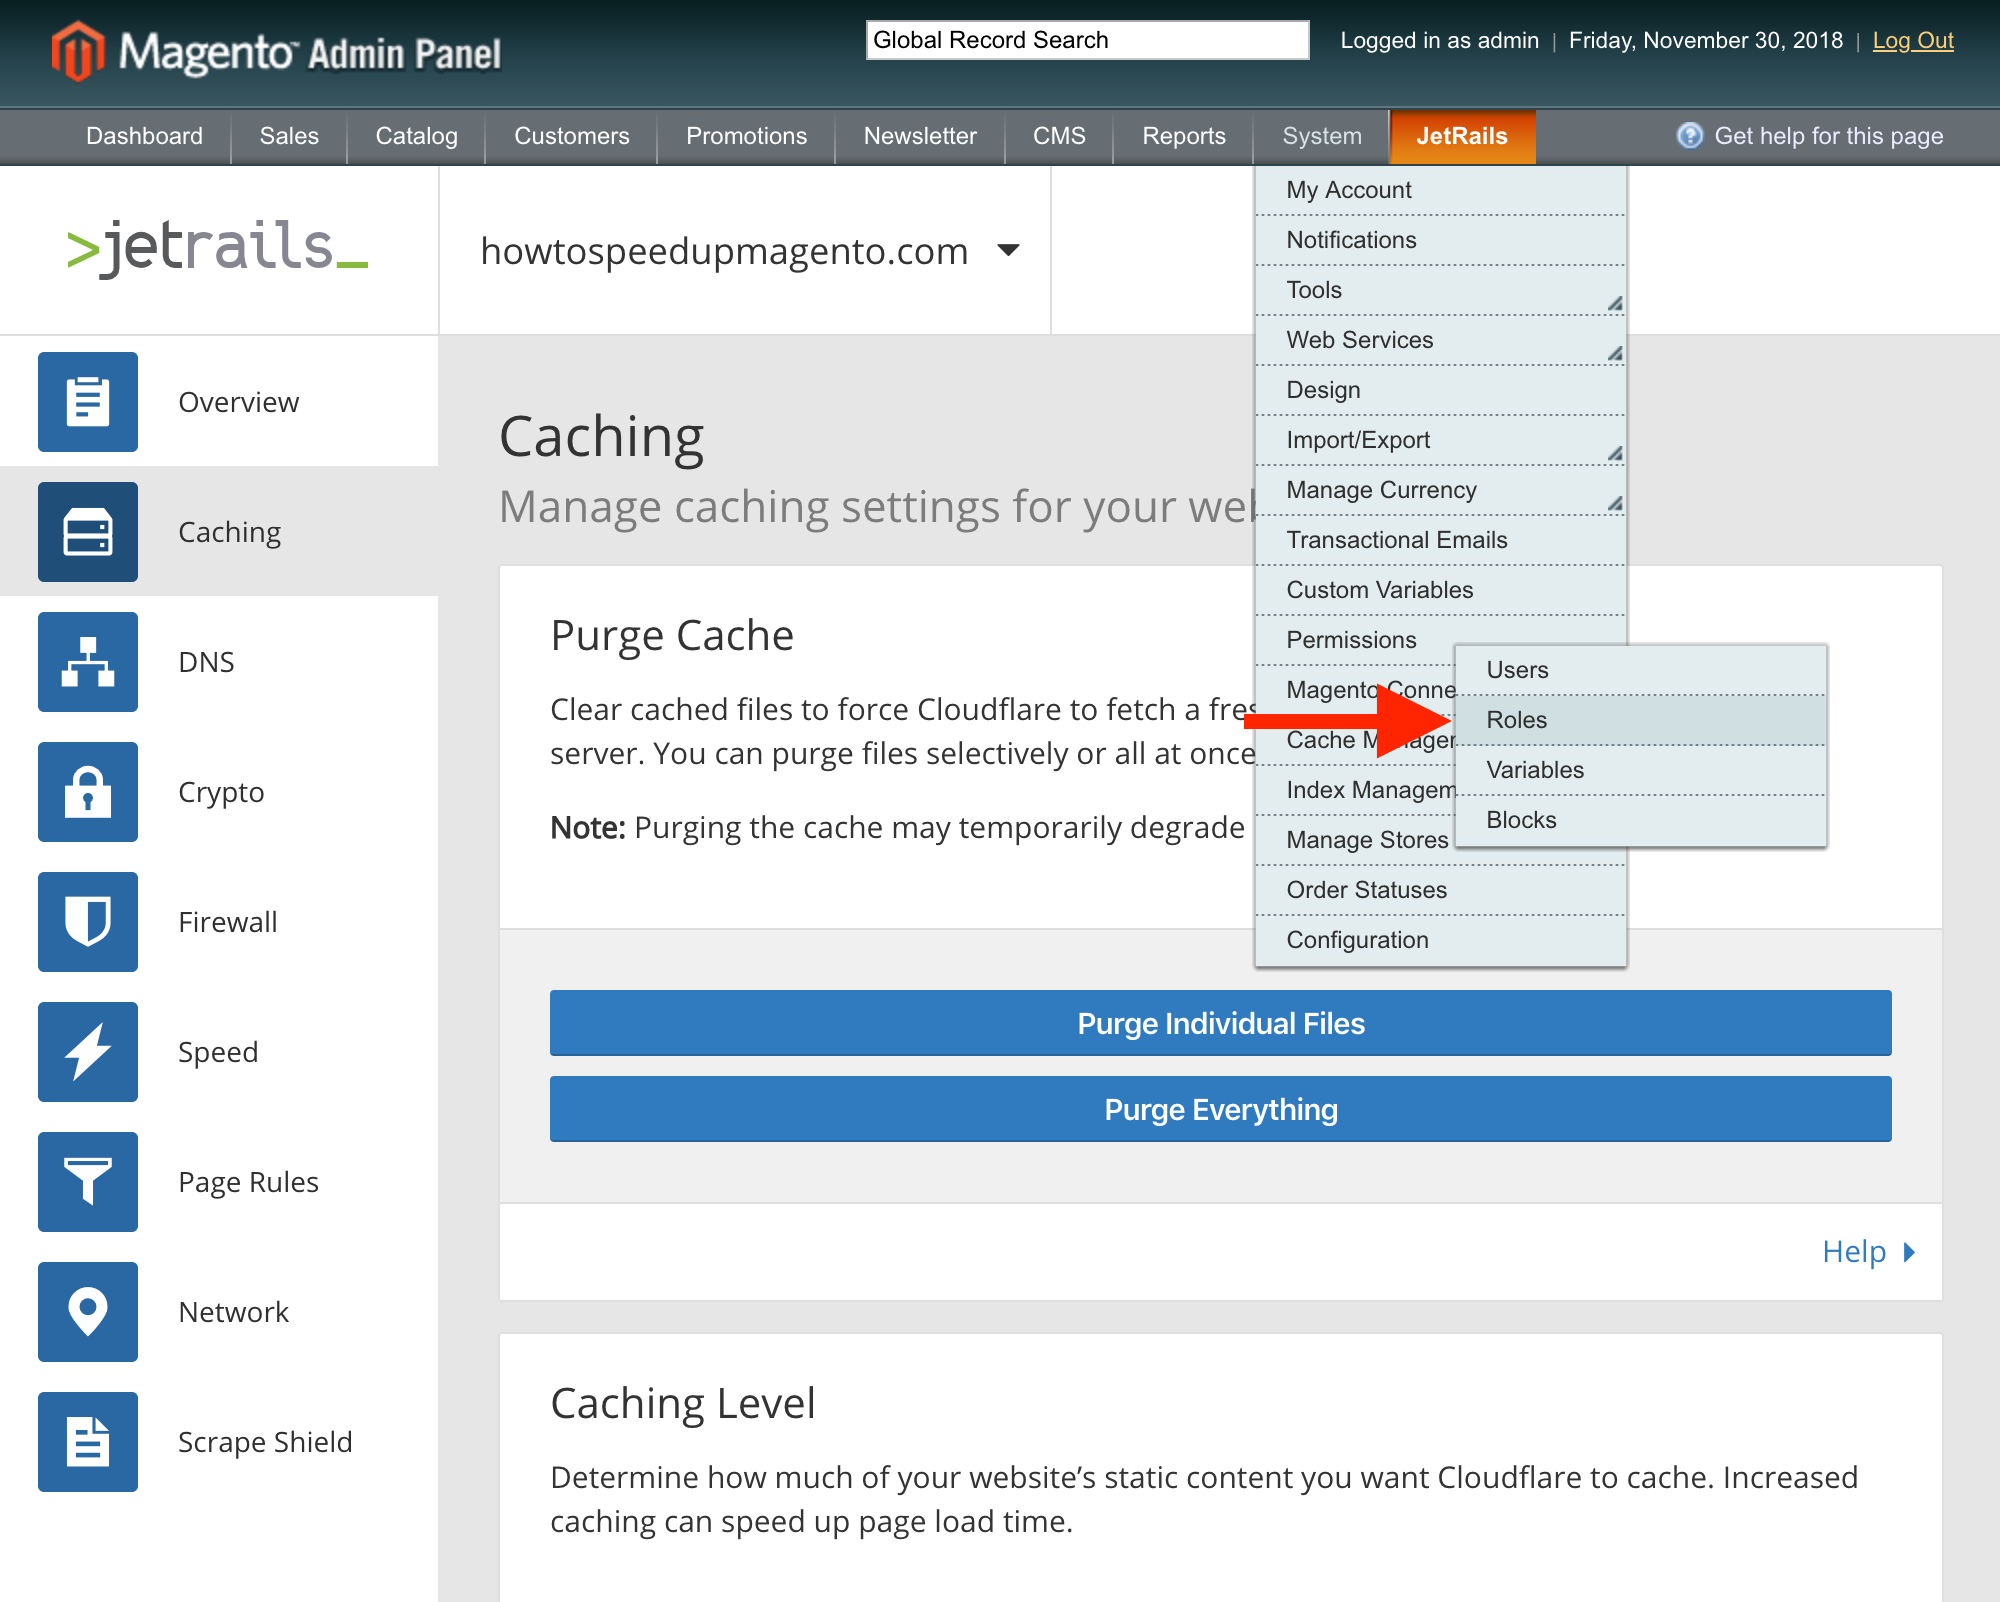
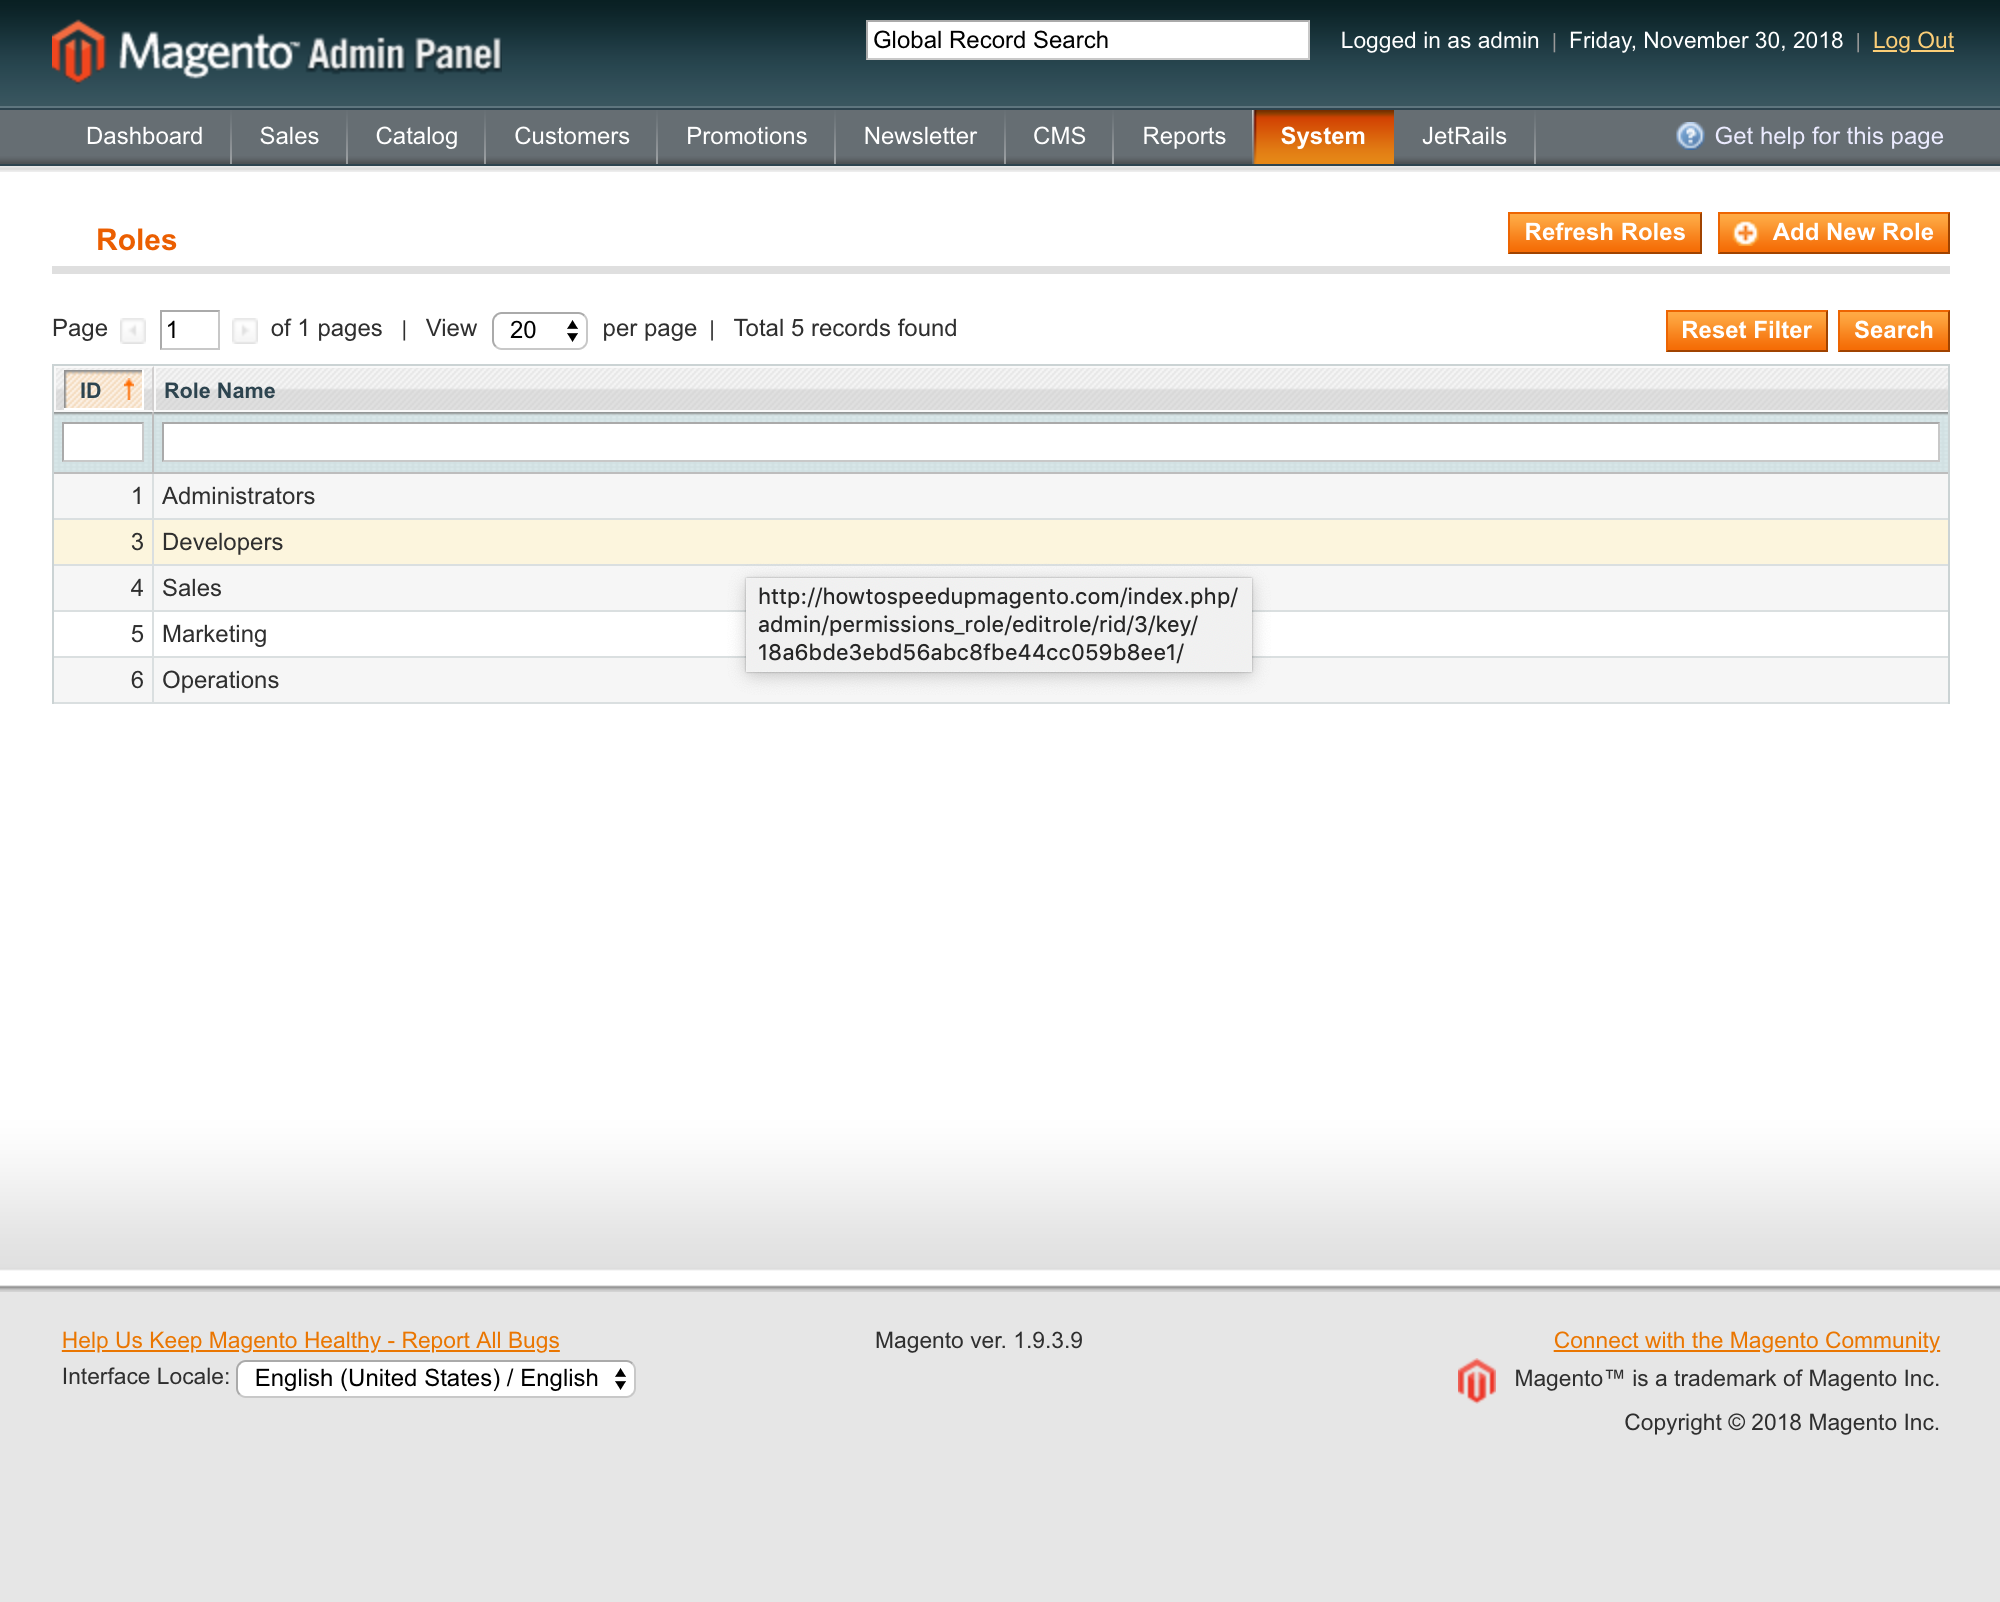
They can then click on the developer role to edit it.
Once on the edit page, they can go to Role Resources and select the JetRails > Cloudflare > Caching > Development Mode resource.
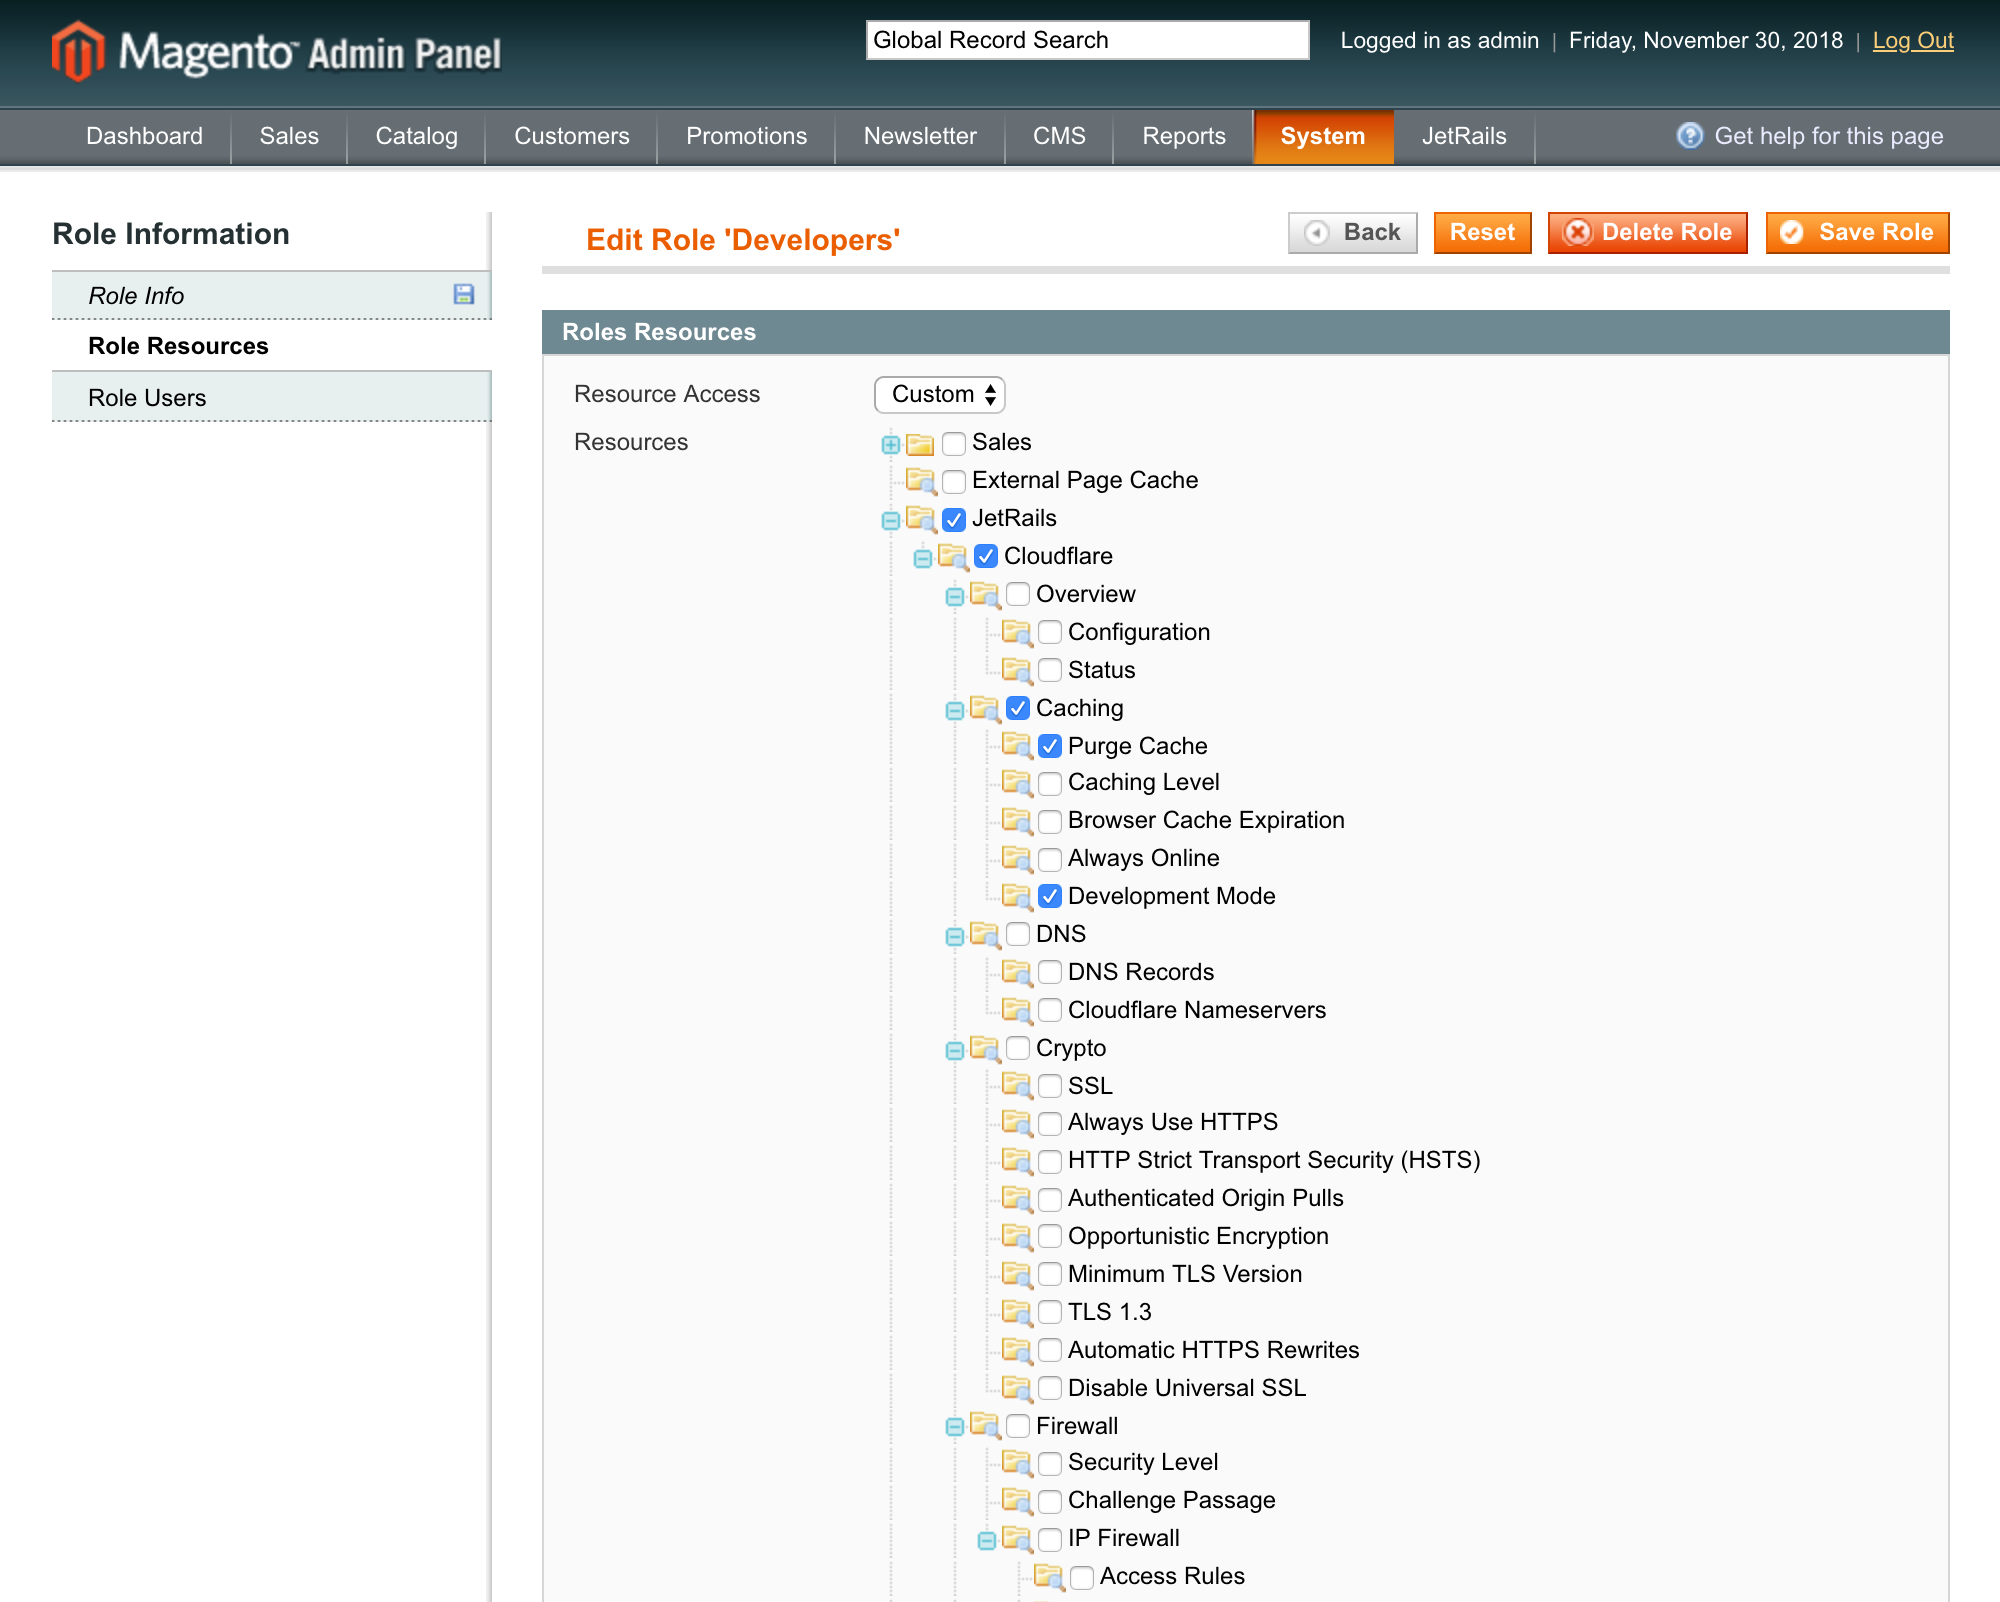
This will give all users that are assigned to that role the permission to use the Development Mode section, while restricting access to all other sections.
Additional support
For additional support or inquiries, please feel free to reach out to us by phone or email. Any found bugs or feature requests can also be communicated to us through email. Any and all feedback would be extremely valuable and appreciated.
Call us at 1(888) 997-2457 or send an email to [email protected].